Free illustration :- Road to Highway , story book illustration

[private]Here is another free illustration , this illustration was done as part of a story book that i was compiling for children . Since this project was a personal one , with time i lost interest in it and it was left half done ! … i might share the rest of the drawings if they make sense but later.You are welcome to download and use in your personal projects for other uses contact me for details

freebie Free illustration :- Road to Highway , story book illustration

[download id=”58″ format=”3″]

Author: Asmaa’Web site: Aifactory Graphics

Software: Adobe illustrator

Downloaded:-[download id=”58″ format=”5″]

Category: [download id=”58″ format=”7″]

Terms of use: [download id=”58″ format=”6″]

Description:[download id=”58″ format=”4″]

Want to submit Vector Freebies for Some Fame & Glory? use the following form!

[/private]

Selling Photos Online for Beginners

selling photos online for beginners and getting paid

How to Sell Photos online Free and Get paid for your work?

PS: this post contains affiliate links ( that is one way of how I make money online) 🙂

What if someone would come and give you a certificate that you can earn a living out of your creativity .

What if you find out that magic formula which many artists are using online and earning peace of their mind and luxuries of life. Can you imagine waking up everyday with a new idea , and once the idea is converted it serves as another earning source for you.

Yes it is possible !

Can you really get paid selling photos online as a beginner that supports your living?

I struggle with answering this question.
Really!

I hear it all the time of the last 16 years I have been working as an illustration Artist . Earning from my creative process and my art. I am not saying or implementing anything out of the ordinary and I am certainly not doing something that no one else is doing .
There are plenty and  by plenty I mean too many , by too many i mean tons and tons of Artists just like me who are earning from selling their work online. So if others can do it so can you!

My Story Selling Photos Online for a living.

I studied Art as a traditional artist, did my masters in paintings but currently I rarely do any paintings . My work is all digital and digital is the world where I sell and earn from my Art and I always wondered how can i sell my photos online for money

My Daily Routine

My aim for sharing my daily routine is not to show off, but to inspire you that there exists a possibility of freedom and if you set your direction towards it you can have it too.

 I don’t wake up everyday worrying about rushing to work , getting there on time and then work till they let me go?

Hmmm not the ideal working situation for an artist right?.

My usual day starts at 4:30 AM . I wake up , say my prayers , mediate , exercise , fix breakfast and lunch for my kids . After sending them to school I turn to my creative corner with a cup of coffee. Work when I want to as much as I want to , I enjoy financial freedom and I enjoy my work process. This is exactly how everyone should be living in true essence. This is everyone’s devine right to enjoy freedom to be creative.

Can anybody do it ?

Yes everyone can , to reach this point I have come from times when I rarely slept 5 hours at night .Struggled with paying loans and spending days penniless. Yes that was the time but I worked day and night .Now , at this stage I only work 3-4 hours per day. And enjoy my financial freedom.

retro vintage portrait woman holding camera photographer having bob hair cut working 42754817 Selling Photos Online for Beginners

So what is it that I do exactly?

If you were to meet me in a cafe or lift and you will ask me the same question I will probably simply respond “I am an Artist”. But since we are here with a connection of reading and writing I will tell you more.

  • I am an illustration artist , I create illustrations for other brands and businesses
  • I have a digital shop where I sell my illustrations
  • I have a party invitations shop where i sell my invitations and custom designs.
  • I sell my art on POD (print on demand sites)
  • I create Art for Canvas and products , I am surface pattern designer
  • I sell my art on products through my own website.
  • I create Wall Decals
  • I am a writer , I write content for other websites and for my own.
  •  am a graphic designer I design print and web content.
  • I teach other Artists how to earn a creative living online.


For me creativity is an act of turning your vision or ideas into reality . It is not that not everyone is creative , I believe that we all have a creative soul inside of us . Waiting to be discovered and given a life of its own.

What is Creativity anyway?

artist work portrait happy palette hands foreground 33427308 Selling Photos Online for Beginners

This creative soul is part of all of us , young or old , we all have the power to transform our ideas into reality.

Creativity is limitless and in many forms. Perhaps that is why since the evolution of mankind human race does not run out of ideas.It comes in many forms . Same idea  can take a form of painting , a doodle , a book a piece of sewing , craft, food , product or anything!.

There is whole lot of creativity in yourself waiting to be discovered . Creativity waits for you to talk to it and then come out as your buddy . A buddy you can rely on and if you are able to create that connection , creativity can help you manifest your dreams and money as well.

I have been in the creative business since last 16 years and I have been a creative since last 40 years. I have been busy creating , drawing since as long as I can remember.

It was a shared believe that I heard a lot that creativity is God’s gift that only few have. But the more i started working creatively , I realized that creativity is in all of us in one form or another . We just need to explore it For some, creativity demands more to surface up , for some it is easier to have a great connection with creative process. But , it is there in all of us.

I remember while I was doing my MFA . We had an artist amongst us who was not really good at drawing. She had difficult time connecting to that creative person inside her. But she WANTED to connect to that creative soul. While rest of us would step away once in a while from our works she would continue erasing , redrawing , erasing re-drawing .

The result you ask?

She stood second in the MFA exams.

This lead me to believe it more that creativity is in all of us waiting to be discovered and waiting to be found.But sometimes it does become demanding , which does not mean that you have less of it.

How to embody the creative aspect of yourself and connection with your creativity?

Speaking to your creative soul is not as hard as it sounds. God is the ultimate Artist , it is one of his qualities, and he has distributed a fraction of his qualities among human souls.

You just need to connect and work towards waking that part of you.
Believe in yourself

The one and foremost thing that you need to concentrate on first is to have believe in yourself that you are a creative soul. Denial, discouragement and not practicing all lead to failure in any form of adventure with creativity.

The breathing living creative soul needs its food and that food is your trust in yourself . You need to be confident of your abilities and that you have this God given quality in yourself.

How to invoke Creativity ?

There are a few ways that will help you invoke your creativity and help it grow and flourish . These ways go hand in hand with the creative process and are their to stay with ANY creative process for life of it.

1-Experiment

I believe in doing experiments , experiment is food for creativity. Just as air to your lungs and food for your body is essential for living . Experimentation and practice are needed in order to invoke your creative within.

Remember , Not all experiments are successful , Its a process…..

Experimentation and then failure, experimentation and then success it is all part of the creative process.If you fail take it as an opportunity to learn something . Celebrate failure cause you learned something new out of it. Enjoy the process.

2-Love the Creative Process

Imagine if you are going to get married to the person that you love, you are so overwhelmed and you can only see positives in that person. You are oblivious to the negative aspects of the personality of that person.

Why?

Because you are ignoring those traits unconsciously. You dont want to “imagine” that anything negative about the person yo love really exist.

Fast forward a few years, the power of ignoring diminishes , and you start seeing OTHER traits of that person as well.

Just like that , get married to creativity by falling in love , love the failures ,ignore the hurdles and if you do come in contact with a few learn from them .  Failure is only an indication towards what not to do next time.

3-Repetition

Creativity loves repetition ,the more time you spend with your creative process the more dear and near you become to creativity. Concentrate on ONE skill at a time and then make it a point to repeatedly do that task everyday. Set a reminder , set a fixed time just do it . If this is something that you believe will be a driving force m pushing you towards your success then do not give up, believe that every failure has a success hidden inside. Whenever you fail at something , look at the lesson that it brings you.
Step away from the mindset and grief of failing , rise above and see at the state from a higher and different perspective, universe is teaching you lessons that are essential as traits required for the person that you are wanting to be. 

So just breathe and come back to the task with a brand new perspective and if at all possible come back feeling joy and dedication.

It is not that you will be able to start drawing or sketching in a day or two , it is really not that any school or course can teach you to draw in a week or month. You need to go on a date with your creative soul everyday. If there is no commitment , creativity leaves you and finds another soul-mate.

4-Not all forms of creativity will bring you money

I hate to be break this new for you , trust me . But not all forms of creativity will bring you money. There is a creative form which is MORE soulful , which is almost like a prayer. This form mostly call your higher self for connection. This form is not there to manifest money and moolah , this form ONLY brings inner peace and serenity . You are creative for the sake of being soulful only. Turn back and look at the Masters in Arts , they painted creatively all their lives . They lived a life of poverty most of them, their art was only recognized after they died. That my friend is a soulful higher form of creativity that is not there to attract money. But that IS the truest of its from.

5-Creativity will bring you money

Yes just as there is a form of creative pleasure that does not bring any money there is another form as well. That is my friend the commercial Art . As an artist you overlook what your soul speaks , not necessarily you create for your soulful peace you create for the love of money. There is no harm or shame in wanting to earn from your Art , as this too is a blessing to have.

6-Creativity will not bring you money overnight

Slow down , enjoy the process and build up on one skill at a time . Looking at the list of creative processes that I have my hands dipped into , you might be thinking that I have a long list of tasks to do everyday. Fact is over the years I learned each skill set one by one . Expanded into another branch when I was confident of one. Practice and take one skill to a level of money conversion and then move forward. Do not leave a skill halfway , love what you are working on taking it to next level slowly. The next big creative branch will automatically open up for you.

You must step on first ledder find your balance before you take the next step.


Forms of Creativity that you can sell online

Now I can go on and on about the creative process and my mate creativity . But I know that you dear creative person downloaded this e-book to learn how to earn from your creativity.

Chances are that you have already decided upon which creative process you would like to join hands with .

Equal chances are you are still unsure !.

In the later case below are some of the ideas you can use to sell your creativity online.

Try to find ONE that resonates with you if you are starting out , and try to spread your wings to another if you are already in the game.

STEP-1

Brainstorm what you can sell online here are some ideas to get you started.

  • Sell Digital Graphics
  • Sell photoshop actions
  • Sell photoshop templates
  • Sell stock photography
  • Sell stock illustrations
  • Sell graphics on POD sites
  • Sell sewing patterns
  • Sell knitting patterns
  • Sell digital art
  • Sell courses
  • Sell Paintings
  • Sell Art Prints
  • Sell greeting cards
  • Sell handmade crafts
  • Sell Services online


I’d say that this is just a start ~ there are many other creative ways to sell your creativity online.

STEP -2

Now take the idea of your choice and think about it as a business. Here is an example.

You know photoshop

You can sell digital art , sell photoshop actions , photoshop templates , graphic design templates , visiting card designs teach graphic design and photoshop.

You know sewing

You can sell sewing patterns , sell hand sewn items, sell step by step tutorials .

You know illustrator

Sell your illustration services , sell stock illustrations , create cards and artprints , sell on POD sites.

So on and so forth……. Take your creative idea and expand it into the possibilities BE CREATIVE!


STEP -3

Find your Skill

Narrow your next step down to one skill / item at a time.

For example if you are a photographer write down everything that you can do with your photography. All the ways you can earn money from your skill set . Include local services as well. Perhaps you have access to your local market where you can sell better than online? .Brain dump everything out .

Now circle ONE thing that is small , attainable , doable and you can easily master it .

For example you might already have a full drive of photography that you can package and start submitting to Stock photography site ? OR through other creative websites? Take your time move slowly. And then build up on that once you have enough material on one dimension or venue expand to another.

I started by selling stock illustrations , in the beginning my process was something like .

1-Look at the market what sells
2-Create inspiration board
3-Create illustration
4-Keyword research
4-Package for sites according to requirement and submit to stock sites.

NOW the same process is somewhat like this

1-Look at the market what sells
2-Create inspiration board
3-Create illustration
4-Keyword research
5-Brainstorm product ideas
6-Modify illustration to fit various products
7- Create product mockups
8-Create product specification illustrations
9-Seo product Page
10-Create Social media Content and Graphics for sharing
11-Write a blog post about the product
12-Send a newsletter about product
13-Contact wholesale stores with the products quarterly

You can see how I am also recycling my one idea? Giving birth to an idea is just 10% of the job creating product is 20% of the job and the rest you can very well see the line of efforts in selling this.

But fear not most of these tasks can be automated , the above mentioned process is what all the ideas go through but not necessarily I’m the one doing all these steps.


NEED HELP? FREE DISCOVERY CALL

LET’s FIND YOUR ONE IDEA

AND TAKE IT TO THE NEXT LEVEL


STEP -4

Research

Now that you have the idea and you are pretty sure that this will work . What to do next? First and fore-most before you dip your hands into paint bucket , do some research.

  • Are there other people creating this stuff ?
  • What form are they selling this in ?
  • How are they packaging it ?
  • How many are they selling?
  • What subject is selling the most?
  • Which market place is best for this idea?
  • Are there any derivatives or supporting products that I can make ?
  • Who is my direct competitor ?
  • Which social media they are performing better on?
  • How many marketplaces they are selling on?
  • Which market you will start selling from?

And so on and so on……
Write down your research and create an action plan .


STEP -5

Branding

Brand Your name , give yourself a name that you will be selling online with , is it your own name? . Do you want to sell by the name of a brand? . In the real early phase come up with an appropriate logo for your brand . Secure a domain name , secure social media accounts by that name. Branding is one of the most essential and integral part of your plan of selling online.  

Your name should be unique and one that speaks to your style . One that you are passionate and serious about. I will suggest that you should get the logo done professionally as this is will go places with you ! But if you are comfortable with your own illustration and graphics skill you can totally DIY it .

STEP -6

Getting noticed

By this point you must have noticed that the whole idea of “getting paid to be creative” has slowly moved to somewhere out of the scene. You must have realised by now that as creatives we aren’t going to be paid to be creative instead we will be paid because we are creative intellectual business women and men.

We will be constantly strategizing new ways to bring in income and grow our creative business. Unless we test and find new ways to market and make new sales processes we will fail.  While I was exploring and learning the process of “getting paid to be creative” I made many mistakes. At times I was working on too many things and finally when I decided to let go of creative processes that were not serving me , I flourished.

You see if those failures in my creative process never existed I wouldn’t have been where I am today.

We aren’t getting paid to be creative. We’re getting paid because we are intellectual businesswomen. We take our business seriously and structure it to pay us. We are constantly strategizing new ways to bring in income and grow our business. We test new ways to market, make new sales processes, and offer new things in new ways. And we do it over and over again.

I started with 0.30$ for my first sale online and currently I earn $4000 straight off.

Its a process and every process takes time.


Skills required to sell online.

Well that’s the tricky part , When i started my work online back in 2005 the internet world was so simple to hone into. Find a place and get seen , but oh my not anymore!

You have to fight for your place and you have to be very knowledgeable of some tricks to be seen and sell successfully.

I get that you are an artist and you are looking for ways to sell Art Online and start getting paid for your work right now. Gone are the days when you were limited to local business, now you can expand your reach worldwide and sell art online for a good chunk of money as well.
I have een selling art online since last 16 years , ofcourse during these 16+ years I have struggled and tried to find ways to sell art effectively and to do that I took many courses which were not exactly directed towards only selling art.

My journey started with first creating logos, then selling custom illustrations , selling illustrations packed and packaged in various forms including to but not limited to Greeting cards, products, sufrface patterns , custom portraits and cliparts.
All of these are just a few ways that you can make money selling art online, the ways that you can create and sell art is definitely not limited .
In this post I will try to break up the various ways that you can package and sell your art online.
First of all it has been soooooooooooo long since i last wrote ! in ages right! , well i have been writing this little post for a while now and i think it is now time to have it published!!
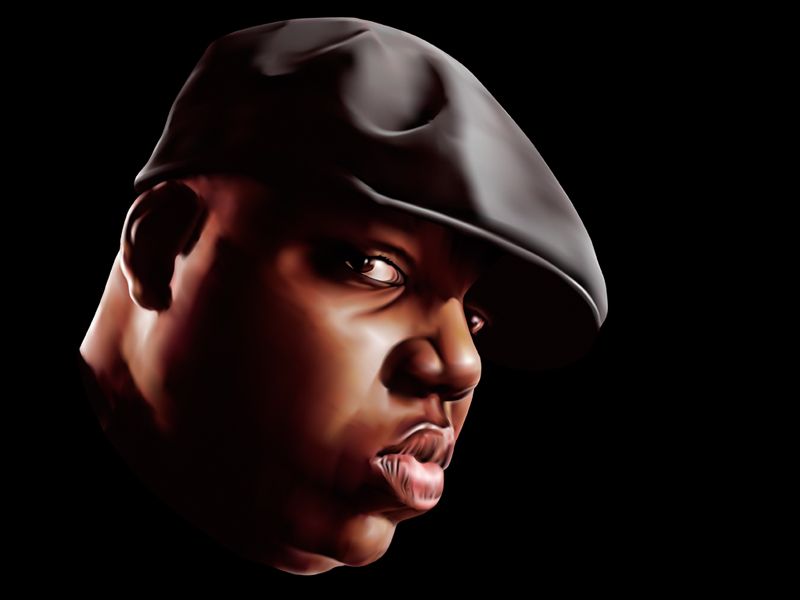
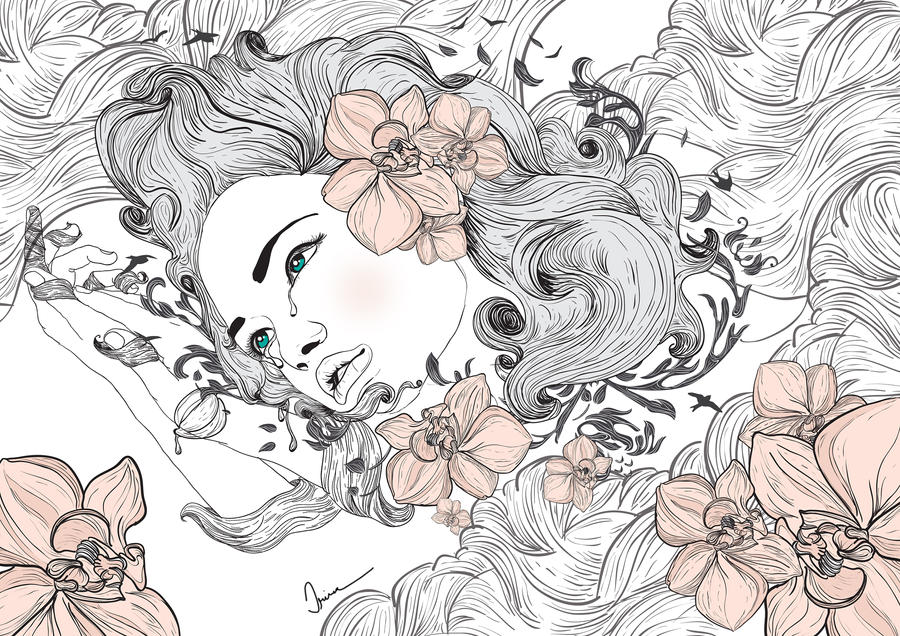
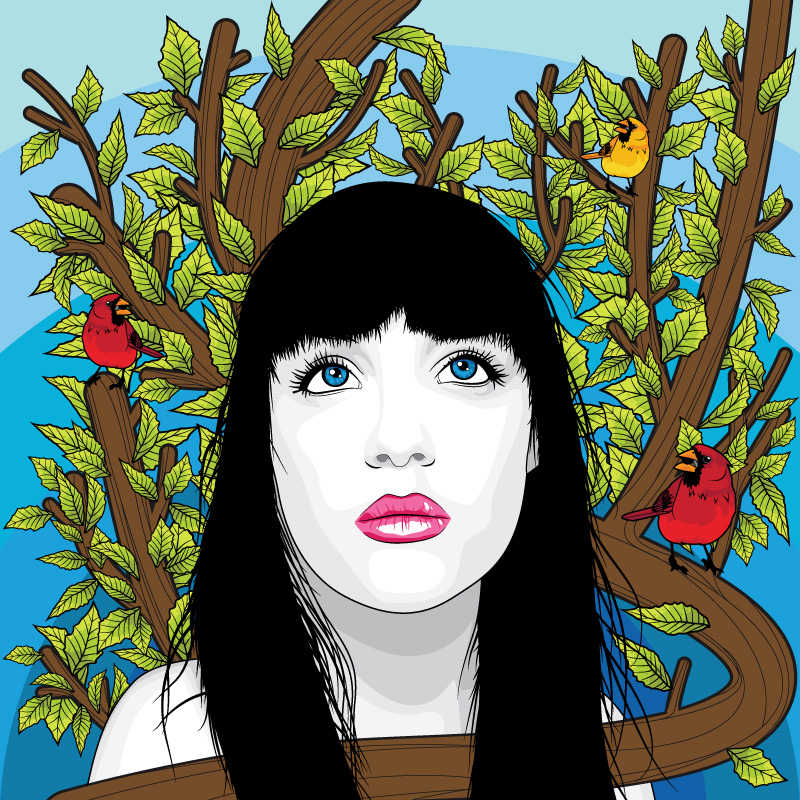
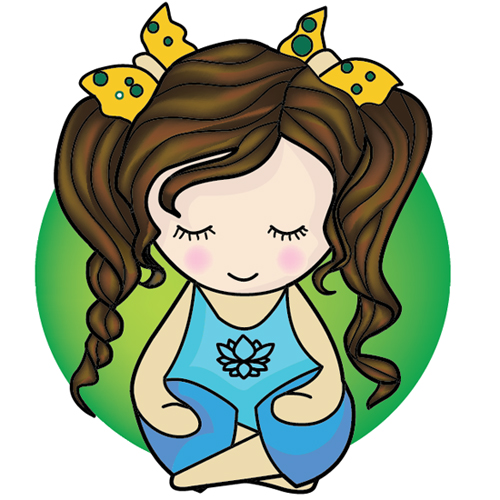
Aivault regular readers might already know that i am an illustration artist who is selling her work through different stock sites. My Journey towards where i am is a very interesting one atleast for me 🙂 . When i started off i had no guide that lead me into selling my work . I was working in a telecom company where i was hired to create seasonal promos and ads , since the job was very seasonal i spent my time exploring sites and pretty much just browsing for cool creative and artistic stuff. At some point i stumbled upon stockexpert’s free image site sxc.hu  , which slowly led me into submitting my application to the main site Stockexpert in order to start selling a few of my illustrations.  Since i always created my own illustrations for the job i had in hand , and since i was a self taught graphic designer i had no idea that there were sites selling illustrations and photographs that you can actually buy and then incorporate into my work … hmm funny right ? 🙂 So , in short i when i sold my first illustration through Stockexpert i was so excited! , although the money in return was not that much at that time but it was great knowing that i can really become independent! One of my very first illustrations  is infact my best selling one and in a period of two years this single image has returned over $1000 ! and is still selling .

World kids 1 © Photographer: One8edegre | Agency: Dreamstime.com

This image is available through Dreamstime , shutterstock , 123RF , Crestock and my own store Aifactory
Soon after my initial submissions i had a questions are there other sites where i can sell same images? answer was definitely yes! . At that time i had just started working on illustrator and i was so thrilled to create more images that i started looking for tutorial sites to help me in the process , and really i found not many that showed me how to use simple basic tools!. So this lead me to creating a blog ie Aivault.com where i started writing tutorials  , and besides that started offering free illustrations every friday. The formula was so simple and it worked like a charm! . Pretty soon the ad space on Aivault.com was returning me $250 in ads space. and around 5000-6000 visitors daily! which could have been better if only i was keen at returns from the tutorial site which was at that time one of the very few around. This  ad revenue was Not much but i was happy doing what i liked and being rewarded in return. Here is one more point that i would like to mention that basically i am painter and all i learned was through exploration and dedication. I knew nothing of computers beyond using msn and browsing for interesting sites or resources to gather inspirations and looking at the works of painters , and artist. Gradually i taught myself , wordpress , how to install , how to handle database , SEO and what i had no idea i would be doing ! 🙂 pretty soon i wanted to sell my work independently aivault now has a store attached to it where i am selling pretty much the same work i am selling at stock sites . But the point is It is mine! I am writing this short story just to move on to the main concept of this post which is how YOU can sell YOUR  illustration and work and here i would like to share a few of my experiences , which i learned the hard way ….

What are stock illustrations? The artist on an open-air

Photo credits © Photographer: Flycat | Agency: Dreamstime.com
Stock photography or Stock illustrations is a term that refers to photographs or Vector illustrations that can be licensed for public or commercial use, which are usually found on professional stock photography websites. These are photographs that can be used for any purpose in marketing, advertising, or design, as long as it is not illegal or harmful. Rather than shoulder the expense of hiring a photographer to take unique photos, many advertising companies,graphic designers, web designers, and other professionals frequently take advantage of stock photography to fill their design needs.

Becoming a stock illustration artist ?

in Order to become a successful stock illustration artist you need to have a mind willing to think For the person sitting at the other side , looking for images on a specific subject. Mostly images are used for designers who compile these images for their specific purpose , there are two ways which you can submit your works in either a fully subjective illustration , second an element to begin creating art with . here is an examples . Secondly each site has its pretty much the same files submitting rules which you must follow but there are some point when you will feel frustrated when the files are turned down because of some itsy bitsy little flaws , A while back i wrote about how to over come these little file issues in one of my posts Ultimate Handbook for illustrations for Clients also another post about Useful Plugins for illustrator might also help you a bit
Cowboy vector setCowboy card
Photo Credits © Photographer: One8edegre | Agency: Dreamstime.com

Becoming independent

I remember during my early days of learning about graphic design a friend of mine said to me , “Think independent , think of a product created in your own field which you can sell and resell ” , this advice got stuck somewhere , my mind started running in circles what can i create as a graphic designer which becomes my product?.. interesting right?… This was realized in form of Vector brushes which i released through my blog now available through store. These brushes were pretty basic ones but they got more attention than what i was expecting. While i created stock illustrations i explored illustrator and was very much facinated with the ability to create brushes and speed up the work process. Hence birth of my very first product , vector brushes !.  i created very basic brush sets for my own work process and then started selling them through Aivault.com

Embroidery Borders Vector Brushes

thumb2 Selling Photos Online for Beginners

Floral Brush Pack :: V2

thumb2 Selling Photos Online for Beginners

Ornate-Vector Brushes

thumb2 Selling Photos Online for Beginners

So far the response had been great , i have made these brushes commercial use OK , which means that you can create and sell products using these brushes. stock illustrations as well. Creating these brushes was a starting point for me to launch my own store hence the birth of Aifactory . And then  after this i just find myself creating base products ie sources like photoshop brushes , frames , borders , vectors for such uses as invitation design , stock illustrations , photographer resources ,digital stampscrafters resources and more and now i am hooked! and in short i am now an independent mom working from home at my own pace , while i keep an eye on my kids :). Thats what i call independence as an artist and as a graphic designer. It is not that i am limited to creating products now i receive custom illustration requests and i simply enjoy doing what i do ! no boss!! i call this my Flight of independence , but still i havent reached my targets which i have planned about .  If this has inspired you a little bit and you are interested in becoming independent artist , or a stock illustrations artist below you will find links to some of the leading stock sites.

Sites where you can sell your stock illustrations.

I have aso covered this topic in detail in another post how to sell photos online and make money
top logo 2 Selling Photos Online for Beginners
logo Selling Photos Online for Beginners
ss logo r rev2 Selling Photos Online for Beginners
123rf logo Selling Photos Online for Beginnersblank Selling Photos Online for Beginners
Selling Photos Online for Beginners
logoAIF2 Selling Photos Online for Beginners
you can contact me directly through contact form if you need any guidance

selling photos online for beginners and getting paid

New Product at AIFactory ! : Ornate Distressed floral Corner and a giveaway!

f you have been a reader of aivault you might already know that most of my illustrations and works in one way or another does included flowers and ornaments . And now my fascination with ornaments and flowers have grown more intense i guess , and is now more mixed with the grungy look of objects that i like ! .Hence the creation of frames which are floral , ornamental and grungy at the same time. The preview presented below will show you 9 corners which i created using Lace Brushes & Floral Brushes that i created earlier.

Free Illustration:- Asian Dol with a bird singing on a branch

[private]Couple of days back i was asked by a friend of mine to create a custom birthday invite for her 1 years old daughter , and that she has searched high and lo for a birthday invite Theme on an Asian dol . Well it really was a fun project after a long time. Not usual custom illustration for me this time. I was free to create a fun looking design . And with the design she also wanted me to design cupcake toppers within the same theme! . This was my sort of a first themed birthday party prject LOL:) .

(more…)

Birds Photoshop Brushes Free download

Last week we released a new brush set if you remember the Photoshop Lace Brushes and staying the same theme we have a new brush set , but this one is a Vintage Birds Photoshop Brushes watercolor set!

011 Birds Photoshop Brushes Free download
02 Birds Photoshop Brushes Free download

OR Download it by Purchasing this post!

While i created this Birds Photoshop Brushes set i also created this calendar using these brushes , it is so simple! and a great gift idea for your friends. here is a preview .
prevcal Birds Photoshop Brushes Free download
I just dragged the New Medallion digital stamps on to my work sheet , along with a stamp of these birds brushes , little text addition and tada……..! 2010 calendar was born!
This calendar is also be available for download through the store .
How to Win a Free copy of this Brush Set?
With these birdies addition here is a chance for you to win a free copy of it! all you have to do is tweet about This freebie chance  and let me know that you did! by leaving a comment here .
Who Won the Lace Photoshop Brushes Copy?
And the winner for the last product update ie Lace Photoshop brushes! is………………………………………………
one of the readers who left a comment on the last post ! and she is RachelSo if you just dropped by and missed the opportunity last time win this new brush set now!
Thank you for reading! have a nice creative day!

DOWNLOAD LINK RESTRICTED FOR ELITE MEMBERS

[membership level=”1″] [download id=”55″ format=”3″][/membership]

Birds Photoshop Brushes Free download

illustrator technique : Create a Swatches Palette from artwork with one click

This illustrator technique  is pretty useful sometimes , when you are done with a particular artwork and would like to work on something else using the same color scheme as well.Or sometimes the artwork has mesh tool and using mesh you have come up with new colors which are not part of your actual swatch. You can easily extract colors from the artwork either by using this tip that i shared a while ago OR by using this one click method!
Here i have created a Japanese dol and i used mesh tool for coloring her. As you can see , my swatch panel just has basic colors with which i started .
Capture11 illustrator technique : Create a Swatches Palette from artwork with one click
Click on the small arrow next to swatches panel and browse to Add used color , no fancy wordings either just straight to the point!. See below?
Capture2 illustrator technique : Create a Swatches Palette from artwork with one click

And there ! you have it , full swatches panel of all the colors used! Neat isnt it? 🙂
Capture3 illustrator technique : Create a Swatches Palette from artwork with one click
I hope this Tip will be useful for someone out there , i have few more with which i will be returning later. thanks for looking !

illustrator technique : Create a Swatches Palette from artwork with one click

[/private]

advanced illustrator tutorials : Coloring illustrations using mesh and knife tool

Tutorial Level :- advanced illustrator tutorials
Techniques Used :- Live paint & Knife tool
Reference illustration :- Ella At Peace

STEP 1

Create and decide the Artwork you want to work on

Since my aim here is just to share with you the process of coloring i will not be going much further in the details of drawing process but i will just elaborate my drawing a bit. I start by creating a sketch , then keeping it in front of me as a reference i turn to Flash . And start working with basic shapes circles and lines , here is a past tutorial on aivault which will show you how. After i am done i export the lines as illustrator 8 document . After opening it up in illustrator i have a clean crisp line which is exactly what i want. This little girl is part of a digital stamps series that i am creating for Aifactory Crafters community , her name is Ella and she is sitting in a yoga pose here 🙂 .

STEP 2

Choose Color Pallette

After I am done with the drawing I turn to color palette and decide on colors with a set of squares filled up with color tones for reference .

It is a good idea to convert your choice of colors into swatches if you are going to proceed with coloring using live paint.
advanced illustrator tutorials
In order to shift colors to swatches palette select a color and then from the tool bar drag and drop it into the swatches panel.

03 advanced illustrator tutorials : Coloring illustrations using mesh and knife tool

STEP 3

Coloring using palette

Once you have your color palette ready select your drawing which needs to be colored . you can easily navigate to next color by moving next arrow buttons on your keyboard. Select the color and then the paint bucket and start filling in the colors.
04 advanced illustrator tutorials : Coloring illustrations using mesh and knife tool

Keep on coloring selecting colors and filling spaces up, what fun!

05 advanced illustrator tutorials : Coloring illustrations using mesh and knife tool
After you are done filling in the basic flat fills you will now see a bounding box something similar to the one below . The whole drawing is at the moment one object , click on expand button you see on the top bar.

07 advanced illustrator tutorials : Coloring illustrations using mesh and knife tool
Right click and ungroup , this will break every section apart.
08 advanced illustrator tutorials : Coloring illustrations using mesh and knife tool

STEP 4

Shading

I love using mesh tool in my coloring it is a very handy and useful little shading tool , select a section and after selecting the mesh tool and your desired color click anywhere on the flat shaped area.
09 advanced illustrator tutorials : Coloring illustrations using mesh and knife tool

Continue with the shading wherever you require , more fun!!

10 advanced illustrator tutorials : Coloring illustrations using mesh and knife tool

Now i will be using another useful technique to give form to the body of the girl . I chose to start with the face click on the shape area and create and reserve a copy of it.

11 advanced illustrator tutorials : Coloring illustrations using mesh and knife tool

For her blushing cheeks create a circle with the same fill color as her face color . Select pink color and with mesh tool click anywhere in the middle of this circle.

12 advanced illustrator tutorials : Coloring illustrations using mesh and knife tool

Make a copy of it and place on both cheeks. simple hun?!

13 advanced illustrator tutorials : Coloring illustrations using mesh and knife tool

Now with the reserved face shape copy , using the knife tool cut out across the face somewhat like below
14 advanced illustrator tutorials : Coloring illustrations using mesh and knife tool
Discard the middle section and bring the cutout shape over Ella’s face. Give it a slightly darker tone .

15 advanced illustrator tutorials : Coloring illustrations using mesh and knife tool

you can further adjust it by reducing the transparency level as well.
16 advanced illustrator tutorials : Coloring illustrations using mesh and knife tool

Now for the shape and form of the body i will repeat the same step

17 advanced illustrator tutorials : Coloring illustrations using mesh and knife tool
Another way is just to choose the section , thanks to paint bucket and expand , we can easily select each section and slice it where it is and shade it.
18 advanced illustrator tutorials : Coloring illustrations using mesh and knife tool
I placed a green circle behind Ella and clicked in the middle while picking up a lighter tone . Below you will see i played with it a bit further and drew a flower on her shirt and clicked a few more times with mesh tool using another tone for hair. And i am done! Ella is all done , sweet and cute , i love her!
19 advanced illustrator tutorials : Coloring illustrations using mesh and knife tool
Ella is available for download through Aifactory store you can find her HERE

advanced illustrator tutorials : Coloring illustrations using mesh and knife tool

How to Create a Vector Diamond Necklace and a Chain

This detailed advanced illustrator tutorials how to create a diamond sparkling necklace metal tutorial will show you how i created the Diamond necklace available to download freely from Aivault through this post. The steps described here will take you through the process of drawing then coloring using very simple steps.

It is not a basic learning tutorial , i expect you to already know drawing tools , basics of drawing , pathfinder tool , live paint and using guides.

OR if you are starting out Read more tutorials on this site

Step 1

CREATING THE DIAMOND SHAPE

Star-off by creating a circle and we all know how to it by now 🙂
01 How to Create a Vector Diamond Necklace and a Chain
Next we will make use of the guides and star dividing the shape with equally sized straight lines and guide as a reference.
02 How to Create a Vector Diamond Necklace and a Chain
03 How to Create a Vector Diamond Necklace and a Chain

Step 2

USING GUIDES FOR DIVIDING THE SHAPE

Create a copy of one horizontal and one vertical line , select the rotate tool , while pressing alt create and rotate a copy of both lines as well as the guide lines.
04 How to Create a Vector Diamond Necklace and a Chain
Keeping the intersecting point of the guides and the lines as a reference align a square inside it , similar to the one seen below.
05 How to Create a Vector Diamond Necklace and a Chain
As shown below create a copy like we did with the lines and rotate it .
06 How to Create a Vector Diamond Necklace and a Chain
Now we need more guides placed , now i dont know any other way of creating the angled guides , i never really explored how to do it 🙂 , my process is to first unlock your diagonal and vertical guide select both using select tool , click on the intersecting point hold shift+alt and rotate the copy . Holding Shift will give you a snap to the middle point. hope it is clear below you can see the screen shot while i rotated the guides.
07 How to Create a Vector Diamond Necklace and a Chain
And here i have a copy done again you can do this by hitting CTRL+D which will repeat your last action.
08 How to Create a Vector Diamond Necklace and a Chain
With guides being our reference start drawing lines as shown below these are in pink color so you can see the progress

Step 3

ADDING DETAILS

09 How to Create a Vector Diamond Necklace and a Chain
10 How to Create a Vector Diamond Necklace and a Chain
11 How to Create a Vector Diamond Necklace and a Chain

Step 4

COLORING

Now turn off the guides once you are done. select the full divided / drawn circle with lines and square and using the Paint Bucket Tool fill it up with one color.
Ok you might say why not just fill the circle with foreground color change , the technique i used here is to break the full drawing up in sections and i prefer using live color option HOW? see below.
Here the full drawing is selected and then filled up with one single color . the bounding box you see below show that this is a live color object now .
12 How to Create a Vector Diamond Necklace and a Chain
Click on Expand which you will see on the top bar. This will break the full drawing into devided section making it easy for us to color each. Before doing that left click and ungroup.
13 How to Create a Vector Diamond Necklace and a Chain
Fill it up with gradience as show below
14 How to Create a Vector Diamond Necklace and a Chain
Create a star shape , i will not go into detail on how i did this one in short select the star shape tool with 6 points. create a copy place above and give a slightly tinted color.
15 How to Create a Vector Diamond Necklace and a Chain
16 How to Create a Vector Diamond Necklace and a Chain

Step 5

CREATING THE BACKGROUND

I created a black bounding box now and had sent it to back so i can better develop the final image. create a circle , and go to object>path offset path to create a bit smaller circle placed inside this one.

17 How to Create a Vector Diamond Necklace and a Chain

Using live Paint fill it up with gradient Create a copy and align in the middle

18 How to Create a Vector Diamond Necklace and a Chain

Group the diamond shape that we created above and start placing it inside the RING that we created.

19 How to Create a Vector Diamond Necklace and a Chain
20 How to Create a Vector Diamond Necklace and a Chain
21 How to Create a Vector Diamond Necklace and a Chain

Give a gradient to the rings as show below.

22 How to Create a Vector Diamond Necklace and a Chain

I created another ring silightly broader to place at the back of this whole drawing. ( create one , offset and use pathfinder to intersect You may want to learn the tools if you dont know then See the Guide here )
23 How to Create a Vector Diamond Necklace and a Chain

Again take a copy of this broader circle and place at the top , and draw an oval shape filled with same gradient.

Step 6

CREATING THE CHAIN

24 How to Create a Vector Diamond Necklace and a Chain

Start building the chain with the copy of the same thing

25 How to Create a Vector Diamond Necklace and a Chain
26 How to Create a Vector Diamond Necklace and a Chain
27 How to Create a Vector Diamond Necklace and a Chain

And Finally the whole thing is complete give a finishing touch by using copy of the SHINE we create using star shape and place it on top

28 How to Create a Vector Diamond Necklace and a Chain

FINAL PREVIEW

Create more copies and give a bit of transparencies.

29 How to Create a Vector Diamond Necklace and a Chain


30 How to Create a Vector Diamond Necklace and a Chain

How to Create a Vector Diamond Necklace and a Chain[private]I’m Done! Share what you created if you create something using same technique! OR  download the Vector File to explore my work place.[/private]

DOWNLOAD THE SOURCE FILE WHEN YOU ARE A MEMBERLogin Or Sign up

You May also like Some more Vector Basic Drawing Tutorials Or Complete list of Tutorials!

[categorythumbnaillist 13]


Wishing you a Merry Christmas

[private]Just a small note to wish my fellow readers and friends who are celebrating Christmas , a very happy day!.
It has been a wonderful and a rewarding year and i am looking forward to a brand new year with more to come  and wish the same for everyone! .
Have a very happy day!

Wishing you a Merry Christmas

[/private]

Brand identity Character Design

custom portrait illustration Brand identity Character Design

  • Are you planning to get your self identified in the ever expanding business market?
  • Do you know how your customers precieve your image?
  • Does your business needs a face to connect rightly to the right audience?

What is Brand identity Character Design illustration?

A look at the previous Brands that got an identity by me.

YmQ3NTFmNGEzYzg5ZCZvZj*w Brand identity Character DesignYmQ3NTFmNGEzYzg5ZCZvZj*w Brand identity Character Design

I gladly take custom orders ! for Mascot illustration , custom vectors , logo design or any of your design projects.
IF you need something  specifically customized we are here to create it for you!. Our turnaround time depends upon , your urgency , details of illustrations Or your input!. If you cant find what you are looking for Order a Quote for a custom project Here

illustrator technique : How to Coloring Artwork Using Live Color advanced illustrator tutorials


%5BUNSET%5D illustrator technique : How to Coloring Artwork Using Live Color advanced illustrator tutorials
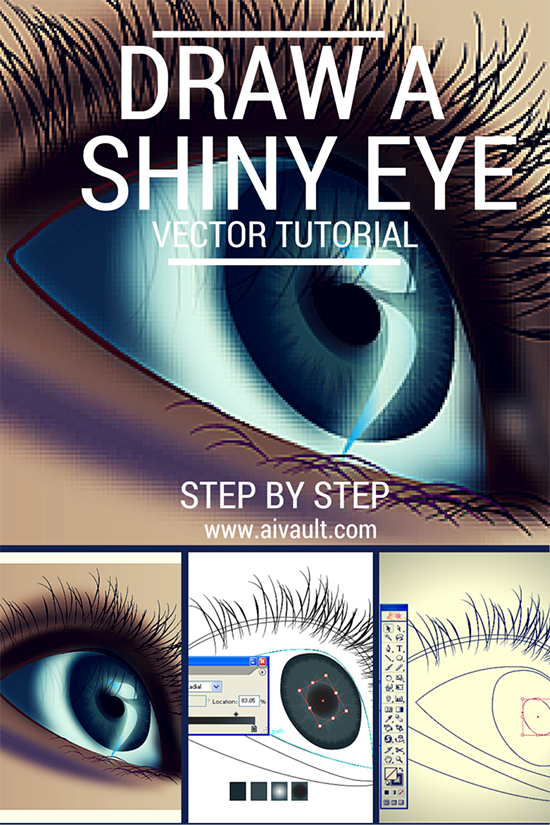
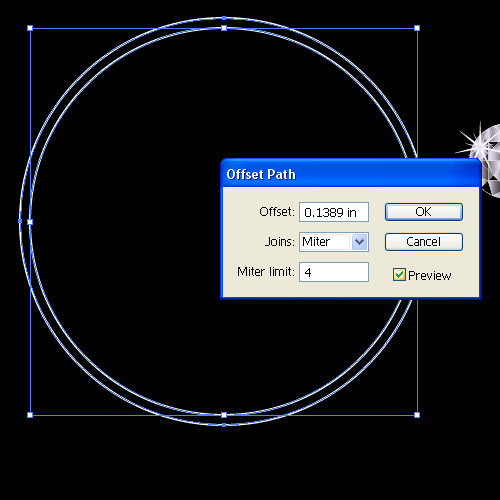
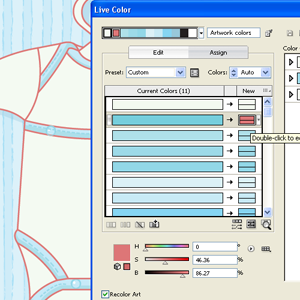
Ok i love this illustrator technique : How to Coloring Artwork , this one saved me tons of time last night and i “had” to share it with you.
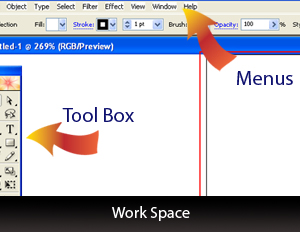
Ever had the need to create same illustration in multiple colors ? no need to recolor selecting each and every color here is a neat little shortcut in Adobe Illustrator to help you out. Here is my problem and solution walk through! (more…)

Tutorial How to Create a Cute Hippo Character in Vector Character Tutorial Illustrator

AIVAULTTHUMB

How to Create a Cute Hippo Character in Vector .This tutorial will show you how to create cute Hippo Character using simple shapes and a really simple effective drawing technique . This technique has been adopted from recent addition to the store of Animal Head Graphic Set , latest addition to the store. Here is how it is done.

(more…)

illustrator Tutorials : How to create a Television Icon

[private]This easy step by step tutorial contributed by Ryan of Vectips will show you how to create a a retro television icon just with some basic shapes and gradients. These technique are easily applicable to other icons, illustration, and logos!

This Tutorial covers the following basic techniques when using illustrator

  • Using Offset Path on an object
  • Learn to use Gradients to create surface texture and depth
  • Create a reflection using an Opacity Mask

(more…)

How to Create Floral Swirls and flourishes in illustrator using Floral vector brushes


prev02 How to Create Floral Swirls and flourishes in illustrator using Floral vector brushes

Flourishes in illustrator

How to create vector brushes illustrator ?

I used to think that how on earth designers make so intricate flower designs and invitations . UNTIL! I found the answer ” they used vector brushes!! ” the answer was vector brushes illustrator

There had been a trend of creating flourish which started around 2008 , that was when I started playing around with illustrator brushes and created many of them. Including the one that I am going to share with you here. Previously I have shared Free illustrator brushes with you but today I wanted to share with you how I actually create floral designs .

So what is my secret tool?

Vector brushes for illustrator

Vector brushes for illustrator

I have created a set of floral brushes for illustrator for my own ease of use and these had been greatly helpful in creating many designs . They have helped me create so many versions of floral branches and creating wedding invitations and more.

florishesv2-preview

Want to see this vector brushes set in action?

Interested? you can get these floral brushes from my store right here.

[shopify embed_type=”product” shop=”asmaamurad.myshopify.com” product_handle=”floral-vector-brushes” show=”all”]

What is included?

original artwork eps file
set of brushes to create these flowers .
scatter brushes of the flowers in the preview artwork.

Very easy to use and create unlimited variations .

Create a Disco Environment with Twirl Tool, Crystalize , and Envelope Tool – Part 2

previewsmall Create a Disco Environment with Twirl Tool, Crystalize , and Envelope Tool - Part 2

In this tutorial you will see how to use envelope tool to create a Disco Ball , You will also utilize Twirl and Crystallize tool to understand its options . This tutorial is divided in two parts . During Part 1 you will be using  Envelope tool & Crystallize Tool.Part 2  will walk you through Twirl Tool options. This tutorial is continued from Part 1 (more…)

Create a Disco Environment with Twirl Tool, Crystalize , and Envelope Tool- Part 1

[private]previewsmall Create a Disco Environment with Twirl Tool, Crystalize , and Envelope Tool- Part 1

In this tutorial you will see how to use envelope tool to create a Disco Ball , You will also utilize Twirl and Crystallize tool to understand its options . This tutorial is divided in two parts . During Part 1 you will be using  Envelope tool & Crystallize Tool.Part 2  will walk you through Twirl Tool options. (more…)

We Are Growing

[private]Hey folks, it’s been a while since I posted about the site and its happenings. AiVault has been constantly growing and i must thank all of my visitor who come and appreciate what they find on the site. With growth comes some issues of management. So i will be in need of some help from you !…. read further for details (more…)

An expressive shining eye tutorial :Part 1

PreviewBig An expressive shining eye tutorial :Part 1

This tutorial will show you how to create an expressive eye as part of a portrait , This is a follow up tutorial of How to create lips using mesh tool ….

The tutorial will be in two parts , in the first part i will explain how to create the eye drawing and then creating the pupil ….We will start by drawing out an eye in outline using the pen tool . Since i will be more concentrating on other tools rather than pen tool i am begining by understanding that you have basic knowledge of pen tool .

So in step one we will draw some basic out line of the eye , this is our drawing that we will be following throughout the tutorial .

Next we will create a bunch of hair growth using the pencil tool .this is freehand drawing of a few lines and then smooth them out using the smooth tool this is the result

001 An expressive shining eye tutorial :Part 1

Which we will save as a symbol .

002 An expressive shining eye tutorial :Part 1

Create and copy an oval shape as seen below

003 An expressive shining eye tutorial :Part 1

Fill it up with a dark shade

004 An expressive shining eye tutorial :Part 1

we will use the crystalize tool in order to distort the pupil shape. This tool is found as seen above in your tool pallette. Double click it to open up the dialogue box. And adjust options as seen which might vary depending on your drawing size . So try to follow the preview of the result. 005 An expressive shining eye tutorial :Part 1

Here is what i got after crystalizing my silightly oval shape , dont forget to keep a copy of the original shape.

006 An expressive shining eye tutorial :Part 1

Resize it as seen here

007 An expressive shining eye tutorial :Part 1

Select the big circle of the pupil make a copy of it and follow the crystallizing options for the same as well.

008 An expressive shining eye tutorial :Part 1

Here is what i got

009 An expressive shining eye tutorial :Part 1

Arrange your shapes

010 An expressive shining eye tutorial :Part 1

Place the Crystallized pupil over the original one. This is for the bigger one.

011 An expressive shining eye tutorial :Part 1

and similarly for the second ones. Here is a pallette of colours that i am using to create the shades of the pupil you can click on these boxes to pick out the colour values if you like. Shade the appropriate shapes accordingly . The darkest shade goes inside the eye.

012 An expressive shining eye tutorial :Part 1

Create a copy of the darkest shade ie smallest circle and apply gradients as seen

013 An expressive shining eye tutorial :Part 1

Place the original circle on top of it. Apply a dark gradient to it.

014 An expressive shining eye tutorial :Part 1

Now we will work on the white area of the eye and below you will see the shades i will be using as the reference

015 An expressive shining eye tutorial :Part 1

Continue to Next Part II

subscribe to Our Rss feed to get the next part in your inbox !

Source file of this tutorial is available to our premimum members. Login Or Sign up[/private]

AiVault Featured

[private]Another feature which i would like to share with all members is recently AiVault was featured at Wbdesignideas Website Although it is a small feature but i am glad to see the word being spread and thanks to all of the users who keep my spirits high and encourage me to keep posting! you can read the feature HERE[/private]

AiVault Interviewed by Pakspectator

[private]I am  so pleased to inform that i was interviewed by one of the pakistan’s leading e-mag  Pakspectator.com  . the interview and the site are not exactl about illustrations and design it is about pakistanis doing something creative out there in any form. Questions ranged from politics to personal thought you might like to take a look! check it out![/private]

Vectorizing Hair : Tutorials

[private]preview1.jpg

Just came across this wonderful tutorial on vectorizing hair . I have been doing Vector portraits for my friends and they loved it but after this tutorial i am sure they are going to adore them. Just follow the tutorial the level is expert so you might want to go back to illustrator help to get understanding of a few options .

(more…)

Vector Brushes Florishes spotted

[private]Recently while browsing i came across an ad of health section of Yahoo and i was surprised to see Florishes Brushes along with scatter brushes used in their ad.! at first i wasnt conivinced but replaying it a couple of times i was quite glad to see my brushes in action ….! I dont know how to capture a flash file from the net i tried to go through my temporary internet files as well but couldnt get it to share with you people … But was quite thrilled to watch a product of one of my creation! 🙂 thanks for all of you who appriciate by downloading my brushes cant thank you enough![/private]

Creating a logo the easy way? Part 1

[private]It has taken me hours in the start to create a logo , Although I would still not call myself a master in logo creation but I have made many customers happy with what they have received . After years of practice one does gets at a point where he/she can achieve some short cuts. One of my short cuts is that  I keep template files when working for illustrator as there are plenty of times when you come across a similar project . There are two ways to work either you show Your aesthetics or you create what the client likes.
(more…)

Illustrator Plugin POP Art

[private]big palogo Illustrator Plugin POP Art

Looking for illustrator plugins i came across this one called 3d pop art plugin from Vertigo 3d software . After the release of illsutrator CS i wonder who will be using this one?. It is being sold for the shooting cost of $65 and i wonder , i really do if people are buying and using it? Any of the effect that they have placed as an example can be easily achieved by the use of 3d option of illustrator itself.  Some interesting vector 3d tutorials that helped me understand this useful tool of 3d can be find here. check them out if you havent tried the 3d tool of illustrator[/private]