[private]
Every next Website has a 100% money back guarentee icon ,Creating one of your own is more fun when you have total control over all the elements of it In this tutorial my aim is not only on showing you how to create the icon but you will also practice and experience few of the tools of illustrator and some ways you use for your creative purposes.
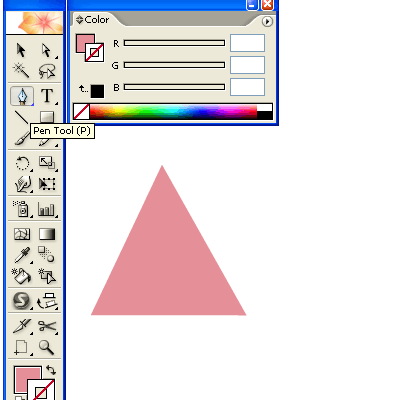
We will start off by creating a simple triangle using Pen Tool shortcut P , Select pen tool and while pressing shift draw a few straight lines to draw a triangle . Now we need to increase the hight of it . with Direct selection tool Shortcut A select upper most node and press shift and move it a bit upward.Untill you have a shape something like this!

Again select the selection tool (V) and select your little tirangle give it a light pink colour if you choose to have a red stamp like i have created. Select the triangle while pressing on Alt + Shift create a copy of it aligned just next to it. Something like this!

Next we will now create our own brush! how exciting is that! … with this technique you will be able to create your own brushes. Now since your last steo was copying the triangle just hit CTRL+D which will repeat your last step , make around 8 copies of your triangle .

Now before we convert this into a brush we will expand the row of triangles. open up your pathfinder window and click on expand . Although there is not much requirement of expanding this at the moment but this step is added for your future reference in case your brush is complicated than this.Following is a screen shot of this.

now open up your brush window ShortCut F5 and create a new brush while selecting the triangle row. Here is how

And click on new file icon as you see here , this will open a dialogue box asking you what type of brush you will like to create?

Create a New pattern brush hit ok

follow the options as i have selected over here.Hit OK….congratulations for those of you who didnt knew till now how to create one!. Now you will draw a circle and apply this brush to it .And adjust the stroke to get what you want , notice we chose method of Hue Shift that will easily let you change the colour of your brush according to your liking . Here i have drawn a circle and dropped the brush to it and adjusted … See here?

Press CTRL+2 to lock your selection .
Now we need to create our red ribbon , we will simply create two circles one inside another and using Align window center them togather. Like this

Once click on vertically distribute center then horizonatally distribute center. now we need to cut the inner part out! open your pathfinder window again and cut off inner circle using Subtract from shape are

drag the shape over your pink triangle ribbon and align them well in center using align tools

Now in order to place text we will use text on path tool!Start by creating a circle just sligtly bigger than the smaller circle you see here. Click anywhere on the Circle and start tying 100% Money Back or whatever you would like for your own badge.

Once you have typed on path use the window >Type > Character window to adjust the spacing in letters and placing of letters by increasing size of circle or rotating it

Once you are happy with your letters go to type> Create Outilnes.

Create a copy of the text and reflect Select the rotate tool Short Cut R and click in the exact center of the circle which will give you a little blue indication of placing your rotating mark now press alt and move your cursor this will create a copy of the text and you will rotate it to place it exactly on the reflected position. As shown in picture below

Just need some adjustments over here you can do that manually as well

Select the rounded rectabgle tool and draw a rectangle across the circles

adjust the stroke weight and stroke colour And write your final text across it using the text tool!

go to select all > object > Expand!
there you have it your very own site badge modify the text to create your own
Conclusion :-
We learned how to create our own brush , how to apply it and expand it .
We learned how to cut off a shape using pathfinder and align tool
We learned how to use text on path
and above all we learned another step towards creativety. 
The source file is available for download to Premium Members only signUp or Sign in
[/private]
 Printables, graphics, backgrounds, vectors, illustrations, fonts, and design elements given on this site are for personal use only. You may not alter them or redistribute them for free or monetary gain without written consent from the author, Asma Murad. If you want to share these resources with others, please share the link to the blog post. Teachers/educators: You may share these with your classes and colleagues as long as they are not edited in any way, Cliparts & Resources shared for free are not to be used as printables for sale.


