by Artinspireblog | Dec 2, 2021 | Drawing, illustrator Tutorials, Tutorials
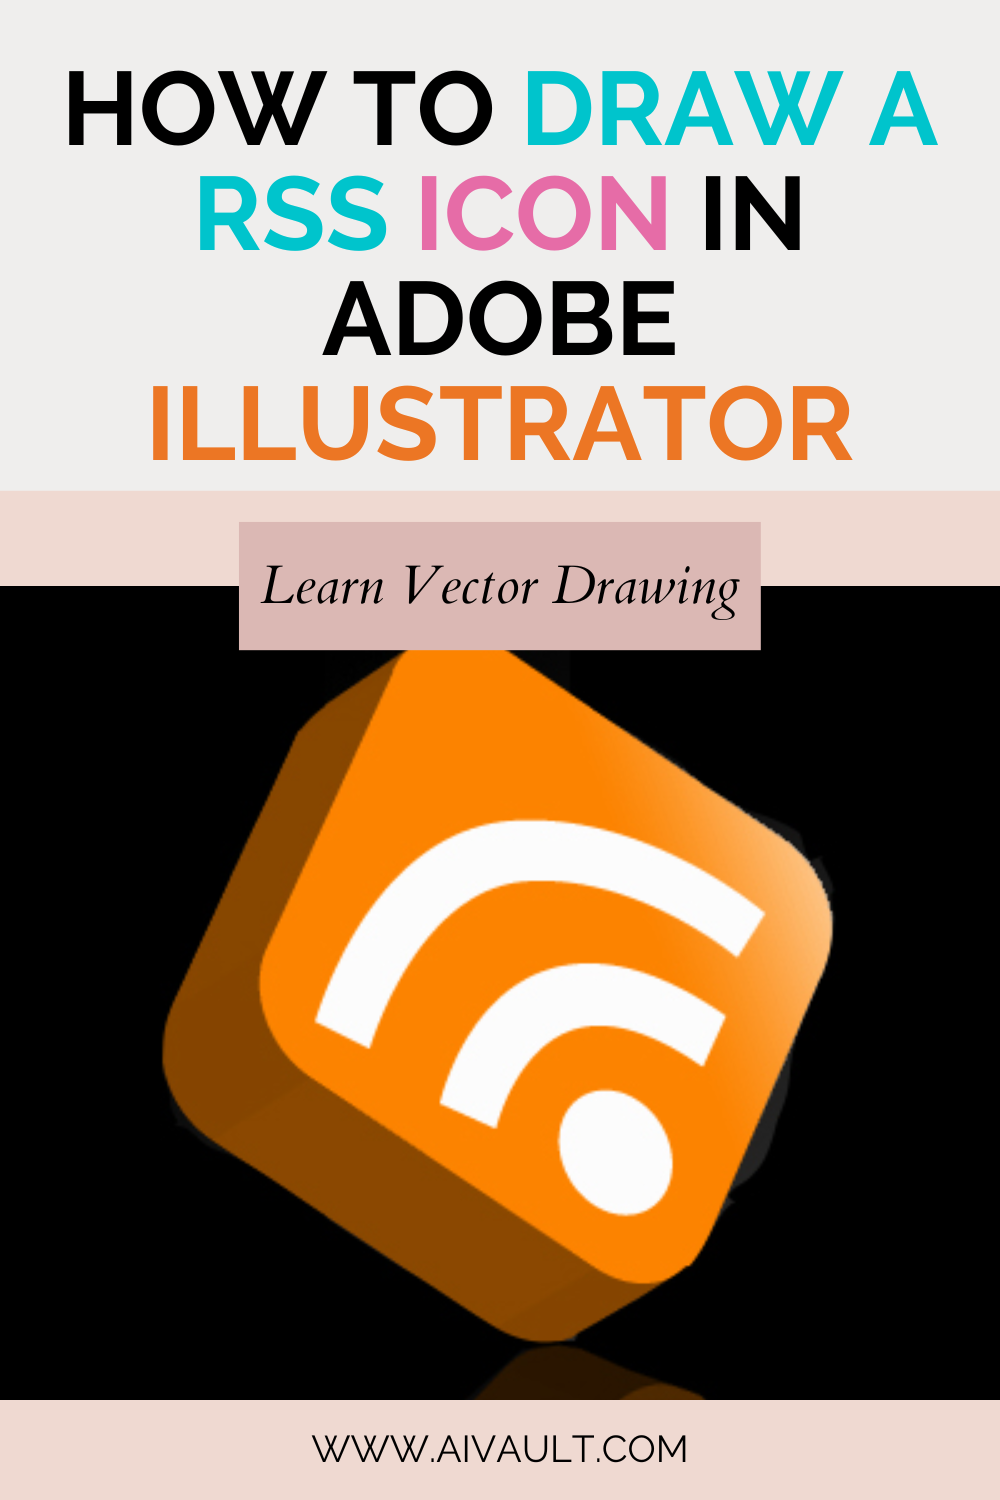
adobe illustrator tutorial draw RSS icon in vector step by step tutorial

Step 1
Lets start by creating a new file , pick out the bright orange colour in your selected colours and start off by making a square with rounded rectangle tool

Step 2
Draw a small circle using Ellipse tool pressing shift while creating will give you a perfect round.

Step 3
use the pen tool to read a path something like this with stroke edges selected as straight as seen in the following image

Step 4
Repeat step 4 this time add a central node as well which will help you achieve a better shape by adjusting it using anchor points

Step 5
Select both the paths and go to object>Expand in the menu which will show up the Expand window , select the stroke expand and hit ok….
Related vector Tutorial : How to Create a drop of water vector tutorial

Step 6
now select all the assets and right click and group . This is important as now when we are going to apply a 3D effect to it illustrator will take it as front face….

Step 87
Now go to Effects>3D>Extrude and bevel with the group selected

Step 8
Play around with the options in the window i have chosen 42 perspective , extrude depth 25pt , and rotate dimensions accordingly . You might like to keep the preview checked and view what is going on 🙂

Step 9
here i have taken the image to photoshop to give it some gradience and play around with it since it is already done you can now do anything with it!

The finished RSS 3d icon
 [/private]
by Artinspireblog | Jun 19, 2021 | Basic Learning, Drawing, illustrator Tutorials, Tutorials
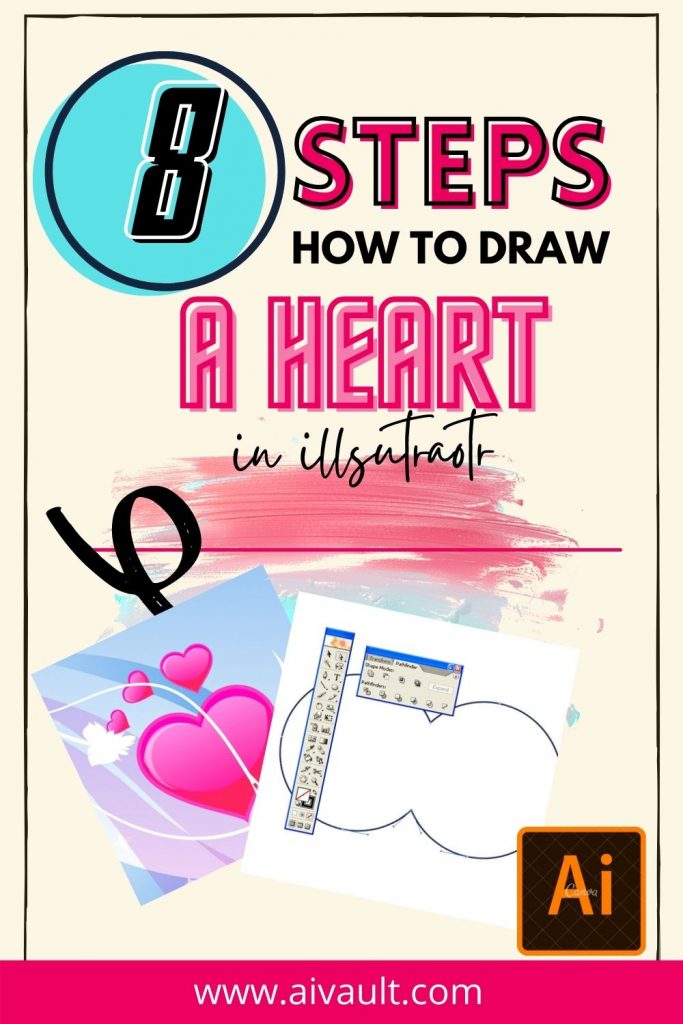
how to make a heart in illustrator step by step : Adobe illustrator tutorial
Are you are looking to draw a heart step by step in illustrator? this Adobe illustrator tutorial consists of using the basic tools in illustrator and will also help you to learn the basic of using Adobe illustrator as your drawing tool.
A heart is a geometric shape and getting a perfect cute heart in illustrator is quite easy , Here i will use simple shape of a circle to modify it into a heart shape although it is not too much of a process . But i am going to show it to you how to draw a heart step by step so you can easily understand the process of it .

This Adobe illustrator Tutorial is somewhat of a beginner level But since valentines day is approaching and you will be seeing hearts everywhere OR will be looking for that perfect heart shape drawing to be integral part of your design . Why not make it yourself !
Without delay here is the step by step drawing process of a heart shape in Adobe illustrator vector.
How to Draw Heart in Adobe illustrator step by step
Drawing a heart shape Step 1 :

Start with Ellip tool L
Draw two circles while pressing down shift , this will ensure that you get a perfect circle.
Hold on to the alt key while selecting the first circle , which will duplicate your current shape .
Drawing a heart shape Step 2

Press shift while you drag the copy towards the right , this will ensure that your circles are aligned while you move one of them. Open the path finder window ( short cut Shift+ctrl+F9 ) by going to windows > pathfinder
Drawing a heart shape Step 3

Select both of your circles and hit the expand button while pressing alt . this will join both of your circles your circle will look now something like this
Drawing a heart shape Step 4

Click on the direct selection tool ( Shortcut A)
Drawing a heart shape Step 5

Select the node in the middle and while pressing shift bring it down a bit something like this…
Drawing a heart shape Step 6

Now we need to adjust the shape of the heart . Start by deleting the two anchor points as illustrated…
Drawing a heart shape Step 7

Now adjust the angles of the four anchor points as shown
We have a perfect heart shape now
Drawing a heart shape Step 8

Fill it with colour of your choice
The supportive eps file will be available for download on coming friday so subscribe or register today if you dont want to miss it!
Related Adobe illustrator Tutorials for beginners :
how to make a heart step by step : Adobe illustrator tutorial
by Artinspireblog | Sep 28, 2011 | Basic Learning, Drawing, illustrator Tutorials, Latest Posts, Tutorials
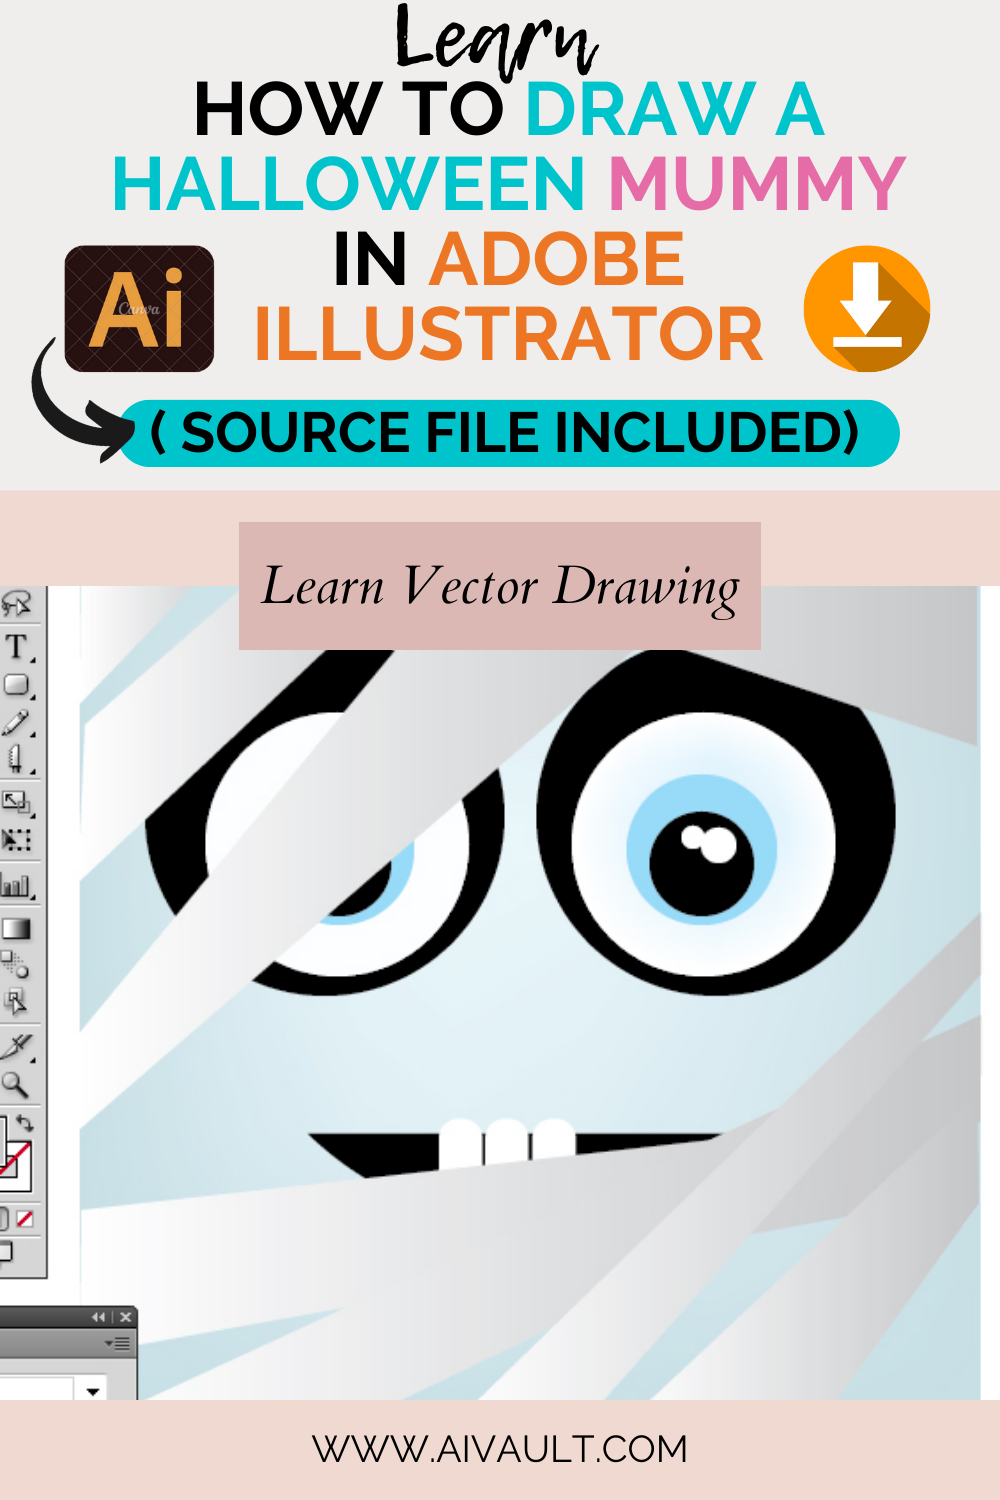
Step by Step Illustration tutorial :How to Draw Halloween Square Mummy Character
Welcome to our step-by-step Adobe Illustrator tutorial, where we’ll be delving into the world of vector art to create an adorable mummy character. Unleash your creativity and join us on this artistic journey as we learn essential Illustrator techniques to bring this cute and quirky mummy to life.
Whether you’re a seasoned illustrator or a complete beginner, this tutorial will equip you with the skills to create stunning vector artwork that can be used in various projects. So, let’s dust off our digital bandages and get ready to unravel the secrets of vector illustration as we craft our very own charming mummy character
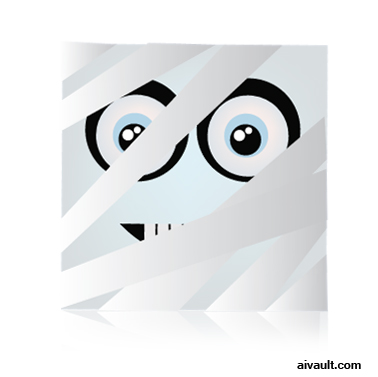
First of all the preview of what we will be creating.
PREVIEW
STEP 1
Start off by creating a simple square , using the square shape tool while pressing shift create a perfect square and color it a light blue color.

STEP 2
Next use the mesh tool (U) and create a mesh node anywhere you like and , now using the direct selection tool (A) select the central node and color it a lighter shade.
Learn more about mesh tool

STEP 3
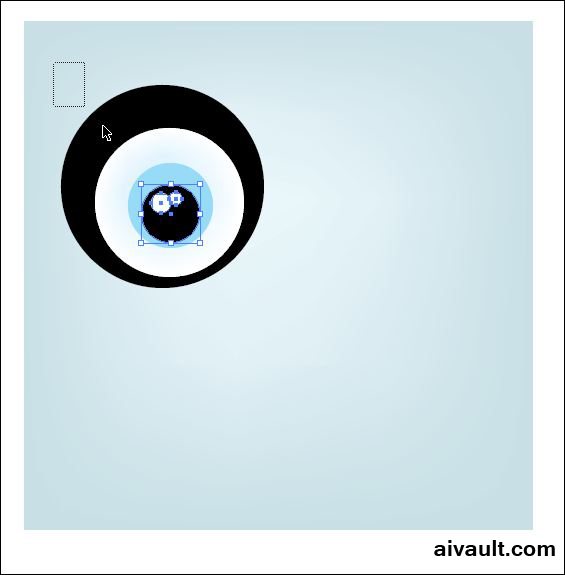
Creating eyes! , draw a black circle and on top of it draw another circle that is white , now using mesh tool create another color point on the white circle , give it a slight blue colour.
Read more about coloring in illustrator

STEP 4
Pretty obvious what i did here , one more black and two more white circles.
STEP 5
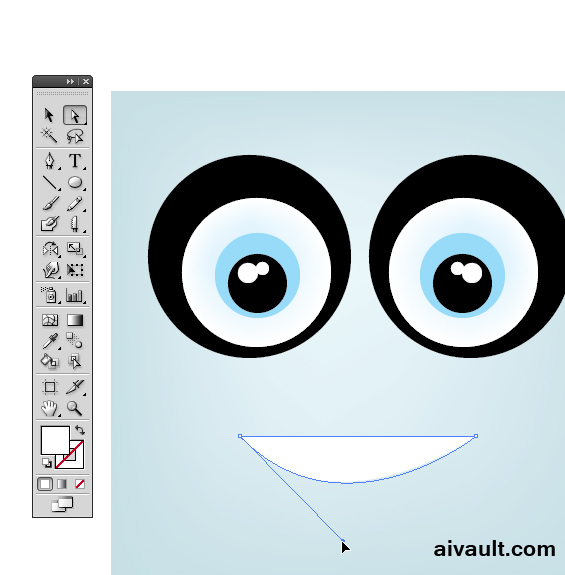
Using Pen tool create a smily little mouth
TIP : to join end points select both point and hit CTRL+J
STEP6
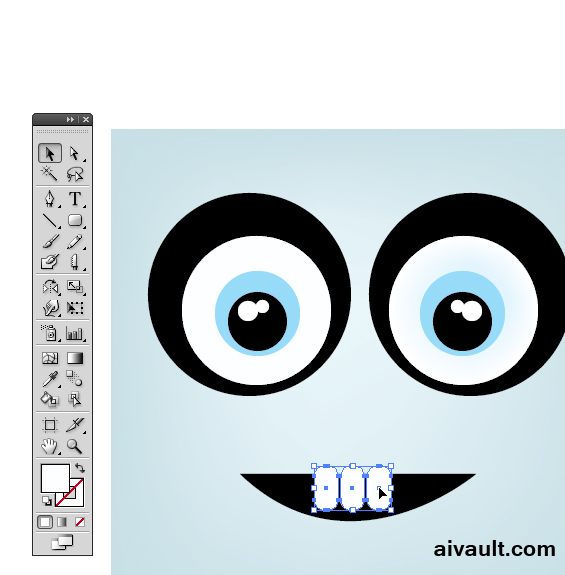
Use rounded rectangle tool and create three teeth side by side.
STEP 7
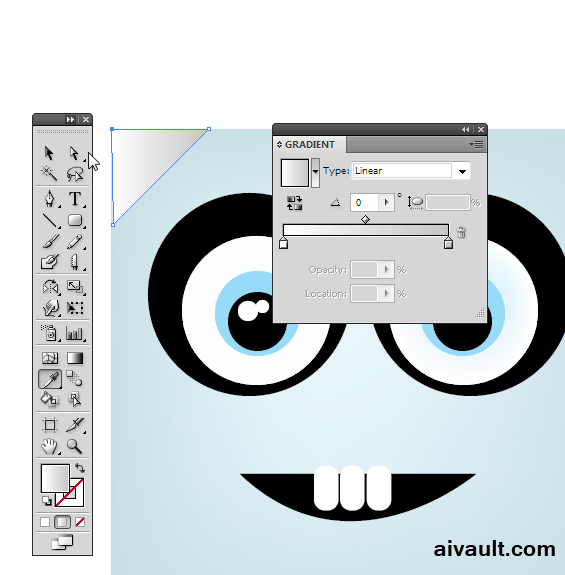
Using Pen tool(P) draw a gradient filled shape , i start randomly and keeping it a bit rough kept on wrapping up my mummy boxter.
STEP 8
Free hand drawing using pen tool continues.

STEP 9
DONE!
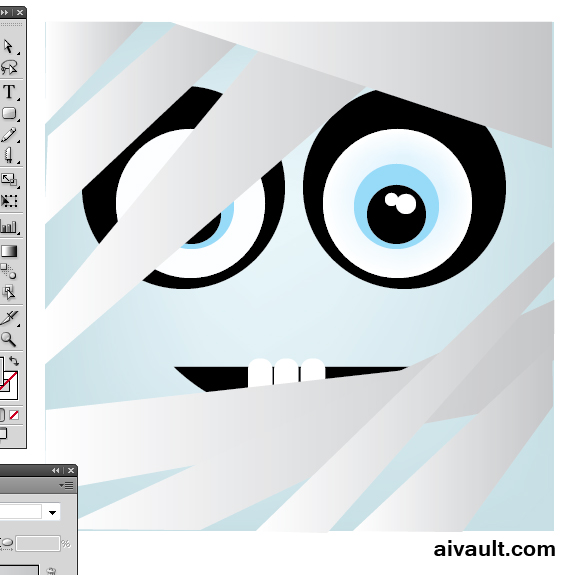
**Boxterz is a collection of whimsical boxed characters which are my new line of illustrations registered and ready for licensing , for licensing inquiries please contact me .
The Character is registered please do not copy or distribute for commercial usage , all rights reserved.
DOWNLOAD SOURCE FILE ( ADOBE ILLUSTRATOR)
You May also like Some more Vector Drawing` Tutorials!
Step by Step Illustration tutorial :How to Draw Halloween Square Mummy Character
by Artinspireblog | May 29, 2011 | Drawing, illustrator Tutorials, Latest Posts, Tutorials
How to draw a skeleton Skull is really easy in vector. This skeleton drawing tutorial is great for beginners This vector Adobe illustrator Tutorial covers making of a sugar skull illustration using easy and basic illustrator tools .
By the end of this tutorial you will know how easy it is to draw a skull using illustrator. It is more of a visual walk through i will be glad to describe any step if you need help along the way just leave a comment and i will get back.
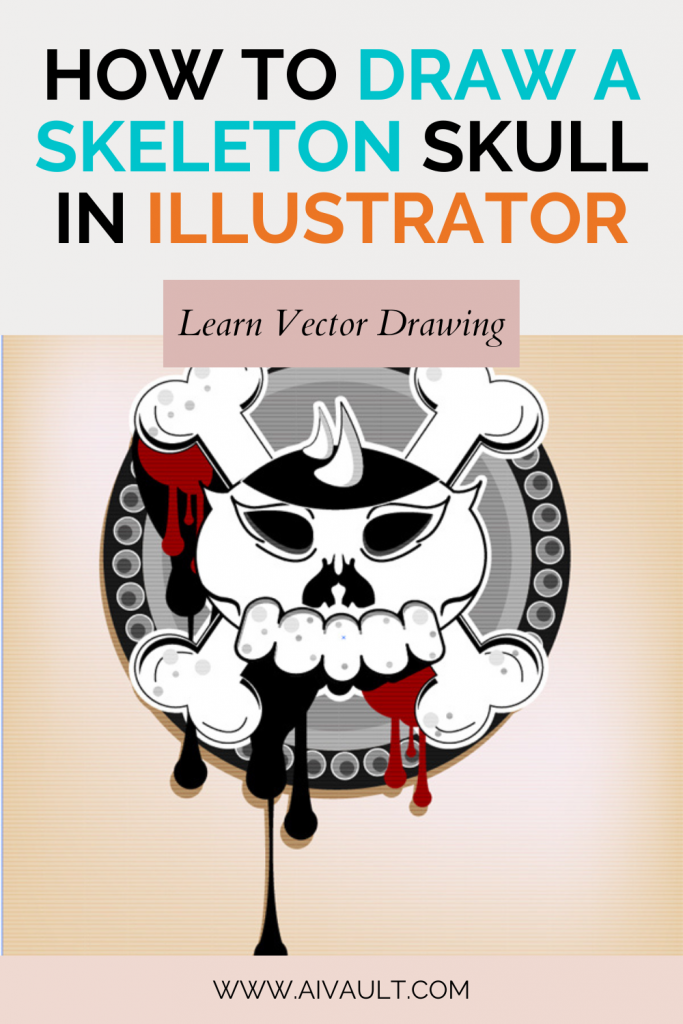
we will be working our way toward the following illustration of a skull
How to draw a skull easy for beginners
Tools used during Adobe illustrator Tutorial include
- pathfinder
- PenTool
- 3D Tool
- Using Brushes
Check out list of other vector tutorials for beginners are available on this site for more info on a specific tools
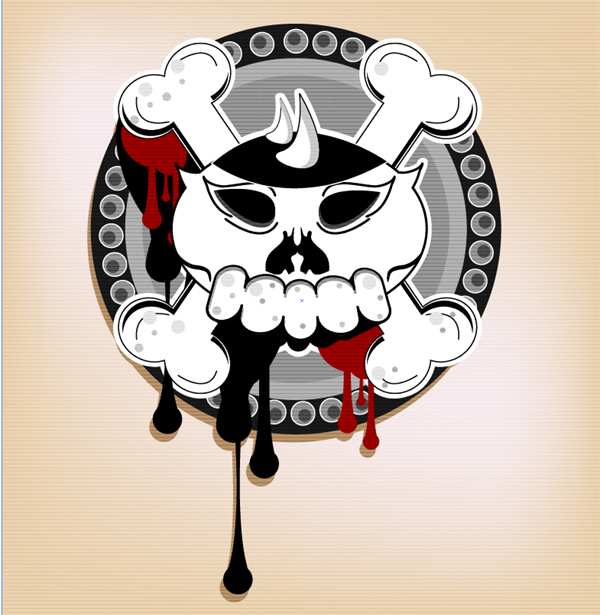
STEP 1 : USING DRAWING TOOL FOR THE OUTLINE OF THE SKULL OF A SKELETON

STEP 2 : CREATING TEETH SHAPES ON THE LOWER PART OF HEAD USING PATHFINDER TOOL

STEP 3 : FREE HAND DRAWING USING PEN TOOL FOR SHAPES


STEP 4 : PATHFINDER TO JOIN SHAPES


STEP 5 : ADDING DETAIL OF EYES, NOSE & OTHER SKULL ELEMENTS


How to draw a skull easy for beginners
How to draw a skull easy for beginners Adobe illustrator Tutorial covers making of a sugar skull illustration using easy and basic illustrator tools . This vector tutorial shows how easy it is to draw a skull using illustrator
by Artinspireblog | Jan 3, 2010 | Basic Learning, Drawing, illustrator Tutorials, Latest Posts, Tutorials
Tutorial Level :- advanced illustrator tutorials
Techniques Used :- Live paint & Knife tool
Reference illustration :- Ella At Peace
STEP 1
Create and decide the Artwork you want to work on
Since my aim here is just to share with you the process of coloring i will not be going much further in the details of drawing process but i will just elaborate my drawing a bit. I start by creating a sketch , then keeping it in front of me as a reference i turn to Flash . And start working with basic shapes circles and lines , here is a past tutorial on aivault which will show you how. After i am done i export the lines as illustrator 8 document . After opening it up in illustrator i have a clean crisp line which is exactly what i want. This little girl is part of a digital stamps series that i am creating for Aifactory Crafters community , her name is Ella and she is sitting in a yoga pose here 🙂 .
STEP 2
Choose Color Pallette
After I am done with the drawing I turn to color palette and decide on colors with a set of squares filled up with color tones for reference .
It is a good idea to convert your choice of colors into swatches if you are going to proceed with coloring using live paint.

In order to shift colors to swatches palette select a color and then from the tool bar drag and drop it into the swatches panel.

STEP 3
Coloring using palette
Once you have your color palette ready select your drawing which needs to be colored . you can easily navigate to next color by moving next arrow buttons on your keyboard. Select the color and then the paint bucket and start filling in the colors.

Keep on coloring selecting colors and filling spaces up, what fun!

After you are done filling in the basic flat fills you will now see a bounding box something similar to the one below . The whole drawing is at the moment one object , click on expand button you see on the top bar.

Right click and ungroup , this will break every section apart.

STEP 4
Shading
I love using mesh tool in my coloring it is a very handy and useful little shading tool , select a section and after selecting the mesh tool and your desired color click anywhere on the flat shaped area.

Continue with the shading wherever you require , more fun!!

Now i will be using another useful technique to give form to the body of the girl . I chose to start with the face click on the shape area and create and reserve a copy of it.

For her blushing cheeks create a circle with the same fill color as her face color . Select pink color and with mesh tool click anywhere in the middle of this circle.

Make a copy of it and place on both cheeks. simple hun?!

Now with the reserved face shape copy , using the knife tool cut out across the face somewhat like below

Discard the middle section and bring the cutout shape over Ella’s face. Give it a slightly darker tone .

you can further adjust it by reducing the transparency level as well.

Now for the shape and form of the body i will repeat the same step

Another way is just to choose the section , thanks to paint bucket and expand , we can easily select each section and slice it where it is and shade it.

I placed a green circle behind Ella and clicked in the middle while picking up a lighter tone . Below you will see i played with it a bit further and drew a flower on her shirt and clicked a few more times with mesh tool using another tone for hair. And i am done! Ella is all done , sweet and cute , i love her!

Ella is available for download through Aifactory store you can find her HERE
by Artinspireblog | Dec 26, 2009 | Drawing, illustrator Tutorials, Latest Posts, Tutorials
This detailed advanced illustrator tutorials how to create a diamond sparkling necklace metal tutorial will show you how i created the Diamond necklace available to download freely from Aivault through this post. The steps described here will take you through the process of drawing then coloring using very simple steps.
It is not a basic learning tutorial , i expect you to already know drawing tools , basics of drawing , pathfinder tool , live paint and using guides.
OR if you are starting out Read more tutorials on this site
Step 1
CREATING THE DIAMOND SHAPE
Star-off by creating a circle and we all know how to it by now 🙂

Next we will make use of the guides and star dividing the shape with equally sized straight lines and guide as a reference.


Step 2
USING GUIDES FOR DIVIDING THE SHAPE
Create a copy of one horizontal and one vertical line , select the rotate tool , while pressing alt create and rotate a copy of both lines as well as the guide lines.

Keeping the intersecting point of the guides and the lines as a reference align a square inside it , similar to the one seen below.

As shown below create a copy like we did with the lines and rotate it .

Now we need more guides placed , now i dont know any other way of creating the angled guides , i never really explored how to do it 🙂 , my process is to first unlock your diagonal and vertical guide select both using select tool , click on the intersecting point hold shift+alt and rotate the copy . Holding Shift will give you a snap to the middle point. hope it is clear below you can see the screen shot while i rotated the guides.

And here i have a copy done again you can do this by hitting CTRL+D which will repeat your last action.

With guides being our reference start drawing lines as shown below these are in pink color so you can see the progress
Step 3
ADDING DETAILS


Step 4
COLORING
Now turn off the guides once you are done. select the full divided / drawn circle with lines and square and using the Paint Bucket Tool fill it up with one color.
Ok you might say why not just fill the circle with foreground color change , the technique i used here is to break the full drawing up in sections and i prefer using live color option HOW? see below.
Here the full drawing is selected and then filled up with one single color . the bounding box you see below show that this is a live color object now .

Click on Expand which you will see on the top bar. This will break the full drawing into devided section making it easy for us to color each. Before doing that left click and ungroup.

Fill it up with gradience as show below

Create a star shape , i will not go into detail on how i did this one in short select the star shape tool with 6 points. create a copy place above and give a slightly tinted color.


Step 5
CREATING THE BACKGROUND
I created a black bounding box now and had sent it to back so i can better develop the final image. create a circle , and go to object>path offset path to create a bit smaller circle placed inside this one.

Using live Paint fill it up with gradient Create a copy and align in the middle

Group the diamond shape that we created above and start placing it inside the RING that we created.


Give a gradient to the rings as show below.

I created another ring silightly broader to place at the back of this whole drawing. ( create one , offset and use pathfinder to intersect You may want to learn the tools if you dont know then See the Guide here )

Again take a copy of this broader circle and place at the top , and draw an oval shape filled with same gradient.
Step 6
CREATING THE CHAIN

Start building the chain with the copy of the same thing


And Finally the whole thing is complete give a finishing touch by using copy of the SHINE we create using star shape and place it on top

FINAL PREVIEW
Create more copies and give a bit of transparencies.


[private]I’m Done! Share what you created if you create something using same technique! OR
download the Vector File to explore my work place.[/private]
by Artinspireblog | May 21, 2009 | Basic Learning, Drawing, illustrator Tutorials, Latest Posts, Tutorials

How to Create a Cute Hippo Character in Vector .This tutorial will show you how to create cute Hippo Character using simple shapes and a really simple effective drawing technique . This technique has been adopted from recent addition to the store of Animal Head Graphic Set , latest addition to the store. Here is how it is done.
(more…)
by Artinspireblog | May 14, 2009 | Drawing, illustrator Tutorials, Latest Posts, Tutorials
[private]This easy step by step tutorial contributed by Ryan of Vectips will show you how to create a a retro television icon just with some basic shapes and gradients. These technique are easily applicable to other icons, illustration, and logos!
This Tutorial covers the following basic techniques when using illustrator
- Using Offset Path on an object
- Learn to use Gradients to create surface texture and depth
- Create a reflection using an Opacity Mask
(more…)
by Artinspireblog | Feb 23, 2009 | AiTools, Brushes, Brushes for illustrator, Design, Drawing, illustrator Tutorials, Tutorials
[private]Since Launching of Aivault Shopi have been more frequently being questioned about modifying brushes , Here is the latest one “How to change appearance of Scatter Brushes!” . In my opinion scatter brushes are such fun to play around with , and if you have an interesting set of scatter brushes you can achieve variety of effects from it . (more…)
by Artinspireblog | Jan 20, 2009 | Drawing, illustrator Tutorials, Tutorials
Have you checked out this awsome freebie from Gomedia of an eyeball popped out? Check that out and view this Video Cast on how to Create a Vector EyeBall yourself which has been popped out with veins and little bit of dripping stuff!something similar to that …..
I have used Line Art Brushes for this tutorial , as well as Vector texture pack from my library. (more…)
by Artinspireblog | Aug 19, 2008 | Best of Web, Drawing, Featured, Tutorials
[private]
Vector illustrations are known to be rather popular in web graphics today. Professional designers are able to create such illustrations in a matter of couple hours. (more…)
by Artinspireblog | Aug 8, 2008 | Drawing, Effects, illustrator Tutorials, Tutorials

An introduction to Gradient Mesh tool
Gradient Mesh tools are used to create a single multicolored object on which colors can flow in different directions , the color transitions achieved are smooth running from one color to another. (more…)
by Artinspireblog | Jul 10, 2008 | Drawing, illustrator Tutorials, Latest Posts, Tutorials

In this tutorial you will see how to use envelope tool to create a Disco Ball , You will also utilize Twirl and Crystallize tool to understand its options . This tutorial is divided in two parts . During Part 1 you will be using Envelope tool & Crystallize Tool.Part 2 will walk you through Twirl Tool options. This tutorial is continued from Part 1 (more…)
by Artinspireblog | Jul 8, 2008 | Drawing, Effects, illustrator Tutorials, Latest Posts, Tutorials
[private]
In this tutorial you will see how to use envelope tool to create a Disco Ball , You will also utilize Twirl and Crystallize tool to understand its options . This tutorial is divided in two parts . During Part 1 you will be using Envelope tool & Crystallize Tool.Part 2 will walk you through Twirl Tool options. (more…)
by Artinspireblog | Jul 7, 2008 | Drawing, illustrator Tutorials, Tutorials
[private]
just came across this tutorial from Vector Tuts . In this tutorial, we’ll see how creating this detailed traffic light is just a matter of building up layers of simple shapes, custom gradients, and the Outer Glow effect.
[/private]
by Artinspireblog | Jun 10, 2008 | Drawing, illustrator Tutorials, Tutorials
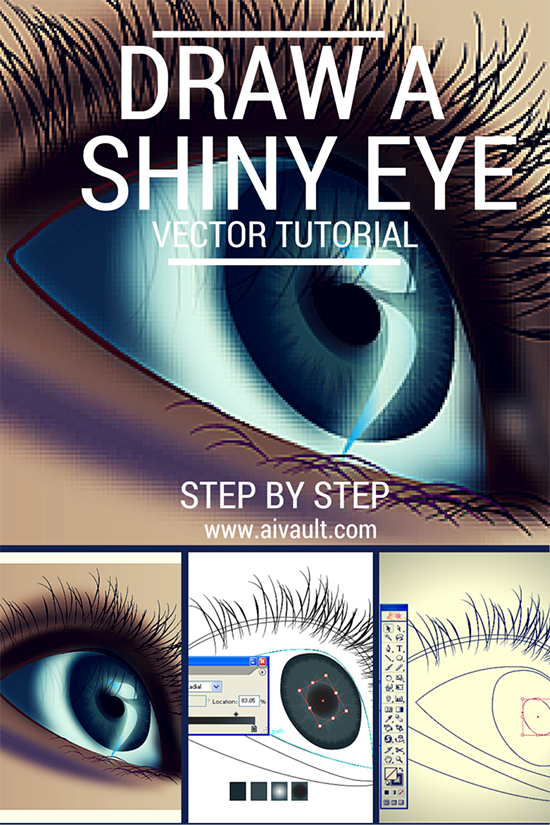
How to draw a human eye in vector step by step

This tutorial will show you how to create an expressive eye as part of a portrait , This is a follow up tutorial of How to draw expressive eyes PART 1
in the last part we were starting work on the white area as seen below . This is how the coloured areas at this point look like

Apply the gradient

Play around and adjust the gradient.

Create a copy of the white area of the eye. Using the knife tool cut out the copy of the white area as seen below.

Place the cut out over the white area , arange it to be at the front . ie right click > arrange > bring to front.

Now create a shape as seen , this will be our eye lid. Create two shapes one inside the big one select both of them , and shade the bigger one a lighter tone than the smaller one.

Use the blending options in order to apply gradient to the eye lid .
ie Object> Blend> Blend options , Work through specified steps which again will depend of your working drawing size . here is what i chose.

Make the blend as seen below.

The result is ….

Now we will repeat the same with the lower shade under the eye. 
here we will work on the deep area of the eye , inner one.create the shape

Create an inner shape as well adjusting the paths to get your desired result. This will be our Hair Growth area of the eye..

Place it quite aligned to the hair placement.

Use Effects> Guassian blur.

select the smaller cutout of the white area.

Using Effects > guassian Blur blur it a bit.

Lower the transparency of the said cutout.
Select the shape above the eye and use guassian blur to blur it a bit.


Create a shape as seen at the inner corner of the eye , note here i have using a stroke line to deepen the left side of the eye giving it a finished effect covering where skin meets the eye.

Create a copy of the large circle of the Pupil Use another copy arrange them and use path finder to cutout a crecent shape.

Place this shape over the left side of the pupil above your Crystallized pupil are , here you can see the arrangement of the areas of the eye watching this small swf preview.

Colour this crecent a darker tone

Use guassian Blur to blur that crecent part as well.
Placing some shine in the pupil area. Create a shape as follows.

Save a copy of it

Blur this shape as well .

Select the saved copy of the shine shape . and go to object> path > simplify

Work on it to get a little simplified and a smaller shape than the original one .Something like this.

Place this over the top of the gradient shine shape

Reduce the opacity of the shine.

I here gave a little bit of gradient to the shine part..

Feeling that left part of the eye needs more depth at this point since i am clearing and defining the areas. I drew another shape. For some of you out there these shapes are NOT perfect ones , This is what i am keeping it intentionally . i believe thing is original if it has a few flaws many wont agree with me here . but…. you are welcome to draw perfect shapes … i dont want the work to be too technical 🙂

Since the eye is a shining one it will be reflecting the eyelashes so i dragged out another symbol of hair from the symbols pallette . and dropped , inverted , reflected it .and reduced the transparency of it.

Draw another stroke over the pupil area.

I have used the Line Art Brushes through out the strokes of the drawing ie , hair and lines. Those of you who dont have it already can download it from here.

Create another small highlighted shape on the inner corner of the eye giving it a lighter shade and then use guassian blur to blur it a bit. here is our finished eye.

Conclusion : we have used line art brushes to draw our basice drawing , used symbols of hair growth to create eye lashes . Used knife tool , gradient , pathfinder , strokes and crystallizing option to create the eye as seen . This is the second tutorial in creating portraits . Previous tutorial in the same series in Creating lips if you have missed it you can check it out here.!
subscribe to Our Rss feed to get the next part in your inbox !
Source file of this tutorial is currently not available
by Artinspireblog | Jun 8, 2008 | Drawing, illustrator Tutorials, Latest Posts, Tutorials

This tutorial will show you how to create an expressive eye as part of a portrait , This is a follow up tutorial of How to create lips using mesh tool ….
The tutorial will be in two parts , in the first part i will explain how to create the eye drawing and then creating the pupil ….We will start by drawing out an eye in outline using the pen tool . Since i will be more concentrating on other tools rather than pen tool i am begining by understanding that you have basic knowledge of pen tool .
So in step one we will draw some basic out line of the eye , this is our drawing that we will be following throughout the tutorial .
Next we will create a bunch of hair growth using the pencil tool .this is freehand drawing of a few lines and then smooth them out using the smooth tool this is the result

Which we will save as a symbol .

Create and copy an oval shape as seen below

Fill it up with a dark shade

we will use the crystalize tool in order to distort the pupil shape. This tool is found as seen above in your tool pallette. Double click it to open up the dialogue box. And adjust options as seen which might vary depending on your drawing size . So try to follow the preview of the result. 
Here is what i got after crystalizing my silightly oval shape , dont forget to keep a copy of the original shape.

Resize it as seen here

Select the big circle of the pupil make a copy of it and follow the crystallizing options for the same as well.

Here is what i got

Arrange your shapes

Place the Crystallized pupil over the original one. This is for the bigger one.

and similarly for the second ones. Here is a pallette of colours that i am using to create the shades of the pupil you can click on these boxes to pick out the colour values if you like. Shade the appropriate shapes accordingly . The darkest shade goes inside the eye.

Create a copy of the darkest shade ie smallest circle and apply gradients as seen

Place the original circle on top of it. Apply a dark gradient to it.

Now we will work on the white area of the eye and below you will see the shades i will be using as the reference

Continue to Next Part II
subscribe to Our Rss feed to get the next part in your inbox !
Source file of this tutorial is available to our premimum members. Login Or Sign up[/private]
by Artinspireblog | Jun 1, 2008 | Drawing, illustrator Tutorials, Tutorials
[private] It seems that illustrator is full of new tools and various elements and more i dig into it more i learn . And it seems every time one more hidden tool is revealed .. Have you heard of envelopes . It seems to be a sister tool of mesh tool . Here is a little bit intro into this so practical tool!!]
(more…)
by Artinspireblog | Apr 15, 2008 | Drawing, illustrator Tutorials, Tutorials
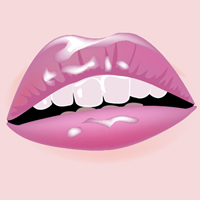
Creating Lips the PepperStyle
User level : Expert
Essential tools knowledge : path finder , nodes handling , pen tool , freehand drawing.Practice tool :- Mesh
(more…)
by Artinspireblog | Apr 9, 2008 | Drawing, illustrator Tutorials
[private] 
My latest exploration is the mesh tool and i am so much loving it! If you havent already tried it just give it a go , Start by creating a circle or box select the mest tool click anywhere on your circle choosing a darker or lighter shade there you have it another exciting new world of using shades and gradience where you have total control of shading…
(more…)
by Artinspireblog | Apr 2, 2008 | Drawing, illustrator Tutorials
[private]
Tutorial Level :- Basic
Tool Practice : Blend , Expand , pathfinder
(more…)
by Artinspireblog | Mar 31, 2008 | Drawing, illustrator Tutorials, Latest Posts
[private]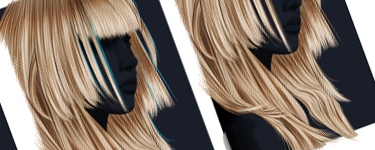
Just came across this wonderful tutorial on vectorizing hair . I have been doing Vector portraits for my friends and they loved it but after this tutorial i am sure they are going to adore them. Just follow the tutorial the level is expert so you might want to go back to illustrator help to get understanding of a few options .
(more…)
by Artinspireblog | Feb 12, 2008 | Drawing, illustrator Tutorials, Make Money, Tutorials
[private]
 |
Every next Website has a 100% money back guarentee icon ,Creating one of your own is more fun when you have total control over all the elements of it In this tutorial my aim is not only on showing you how to create the icon but you will also practice and experience few of the tools of illustrator and some ways you use for your creative purposes. |
(more…)


 [private]I’m Done! Share what you created if you create something using same technique! OR


 It seems that illustrator is full of new tools and various elements and more i dig into it more i learn . And it seems every time one more hidden tool is revealed .. Have you heard of envelopes . It seems to be a sister tool of mesh tool . Here is a little bit intro into this so practical tool!!]


