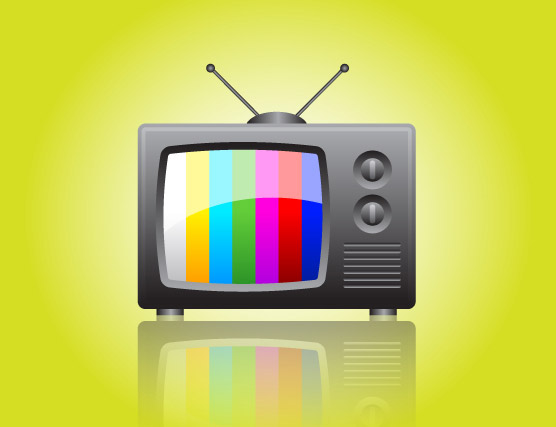
[private]This easy step by step tutorial contributed by Ryan of Vectips will show you how to create a a retro television icon just with some basic shapes and gradients. These technique are easily applicable to other icons, illustration, and logos!
This Tutorial covers the following basic techniques when using illustrator
- Using Offset Path on an object
- Learn to use Gradients to create surface texture and depth
- Create a reflection using an Opacity Mask
Final image Preview
Here is a preview of the final image we will be working through!
Step 1
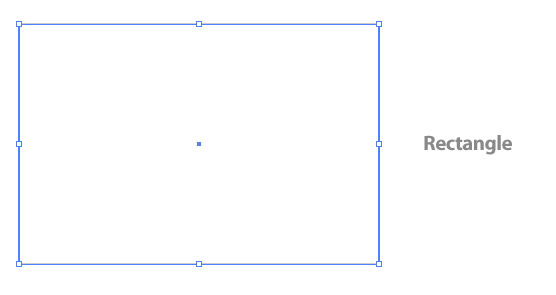
Create a new document and create a 360 px wide by 240 px tall rectangle with the Rectangle tool (M).
Step 2
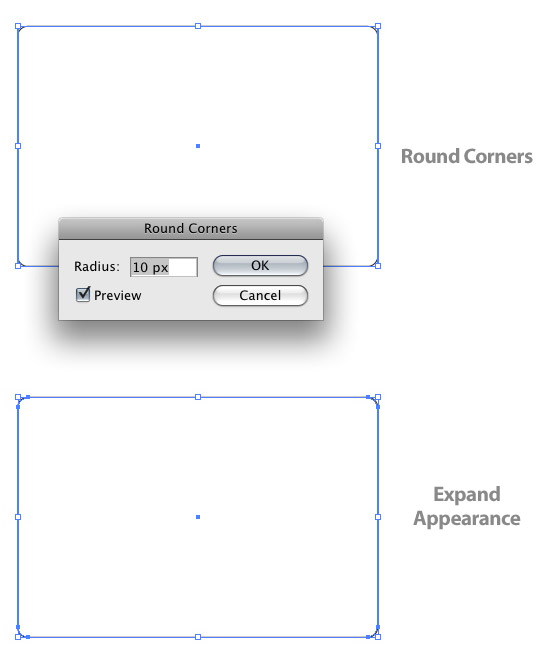
With the rectangle selected, go Effect > Stylize > Round Corners. In the Round Corners dialog, change the radius to 10 px and press OK. Next, expand the effect by going Object > Expand Appearance.
 Step 3
Fill the rectangle with a Linear Gradient from the Gradient panel. Change the first Color Stop in the gradient to a grey color and the second Color Stop to black. With the Gradient tool adjust the gradient by clicking and dragging from the top of the rectangle to the bottom.
 Step 4
With the rectangle still selected, go Object > Path > Offset Path. In the Offset dialog, change the Offset to -5 px. Select the offset path, go Object > Path > Offset Path, and change the Offset to -5px. Now you should have a total of three rectangles.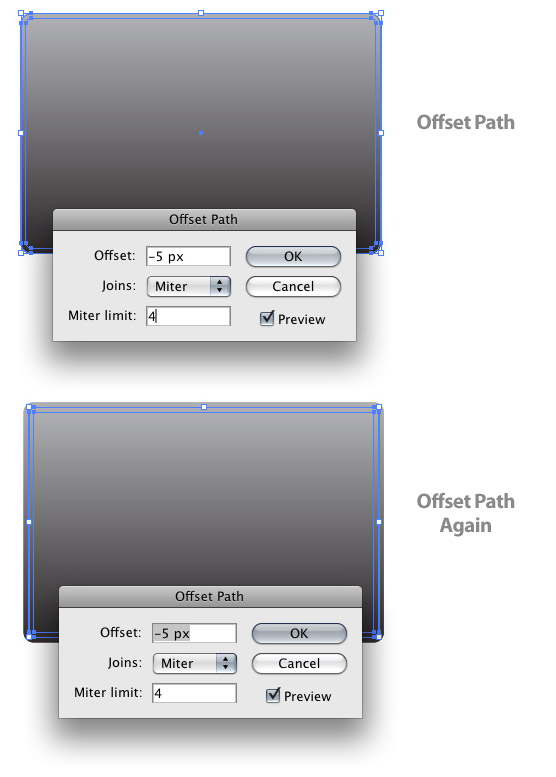
Step 5
Select the rectangles and Ungroup them by going Object > Ungroup (Command + Shift + G). Next, select the first offset path and change the first Color Stop in the gradient to a slightly lighter grey than the original grey.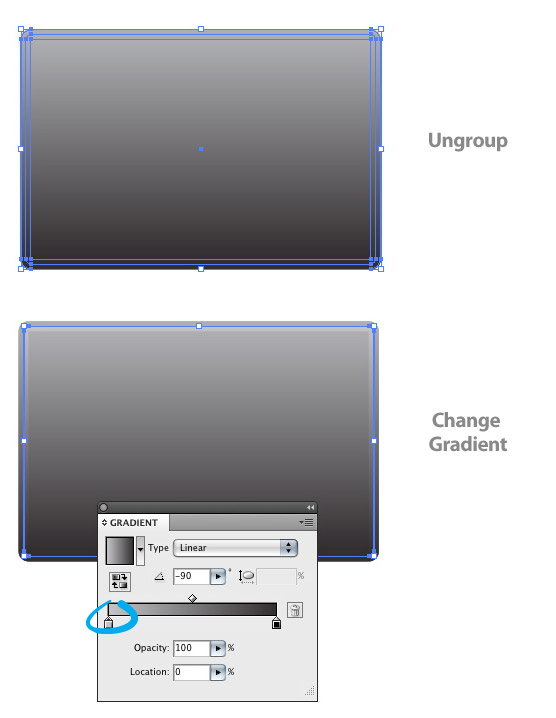
Step 6
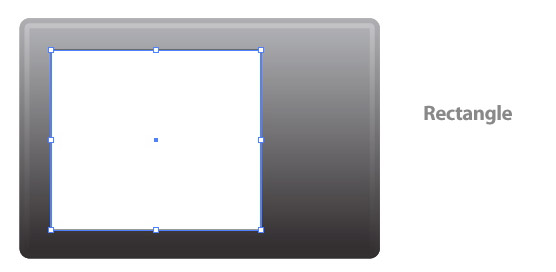
Create a 210 px wide by 180 px tall rectangle over the left side of the first rectangle.
Step 7
With the new rectangle selected, go Effect > Stylize > Round Corners. In the Round Corners dialog, change the radius to 10 px and press OK. Next, expand the effect by going Object > Expand Appearance.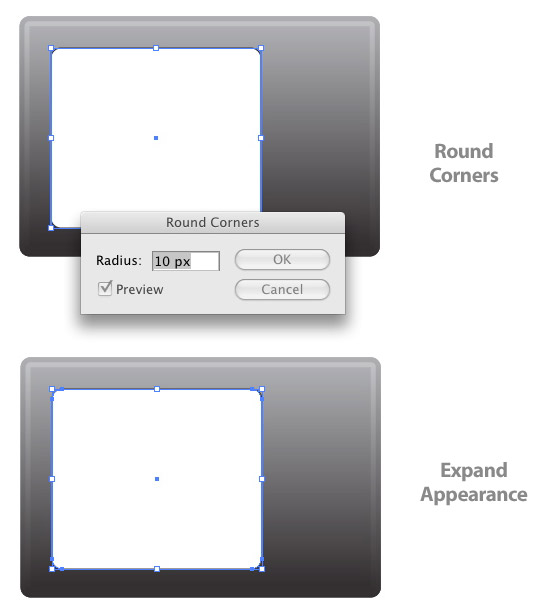
Step 8
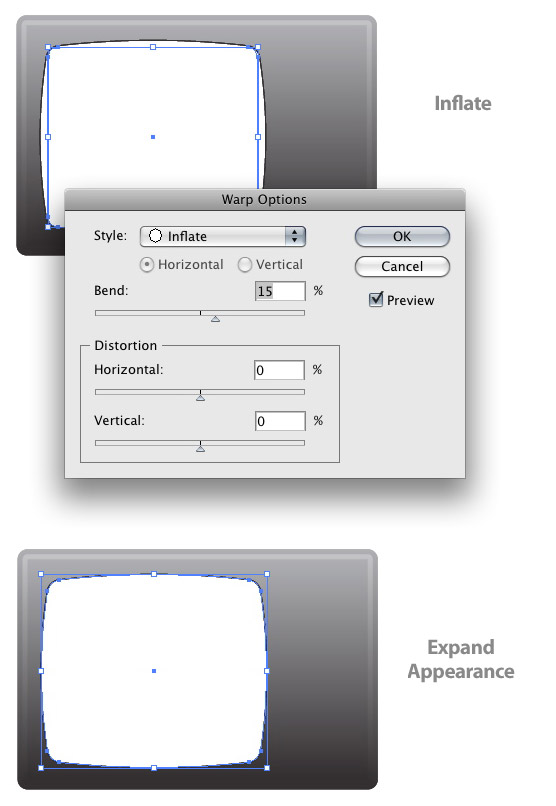
With the rectangle still selected, go Effect > Warp > Inflate. In the Warp Options dialog, change the Bend percent to 15. Next, go Object > Expand Appearance.
Step 9
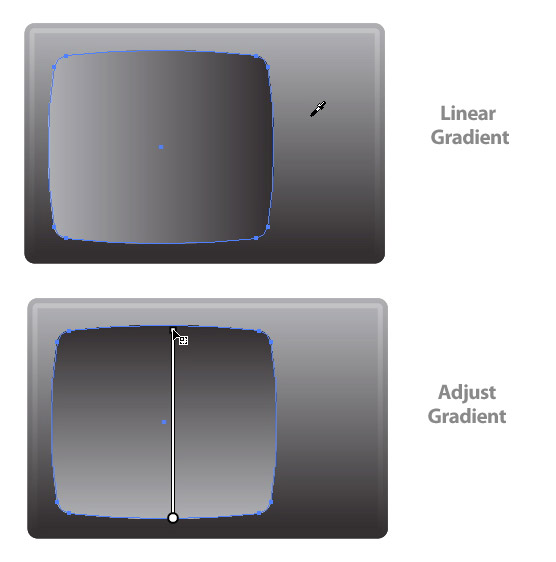
Fill the rectangle with the same Linear Gradient as the main rectangle. You can easilly do this by sampling the original gradient with the Eyedropper tool. Next, adjust the gradient by clicking and dragging from the bottom to the top of the rectangle so the light part of the gradient is at the bottom of the rectangle.
Step 10
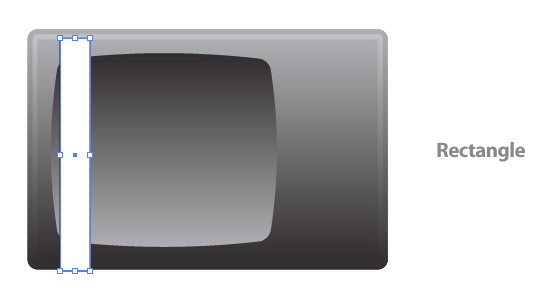
Draw a rectangle that is 30 px wide and tall enough to cover the television screen (the inflated shape just created) and place it on the inside left side.
Step 11
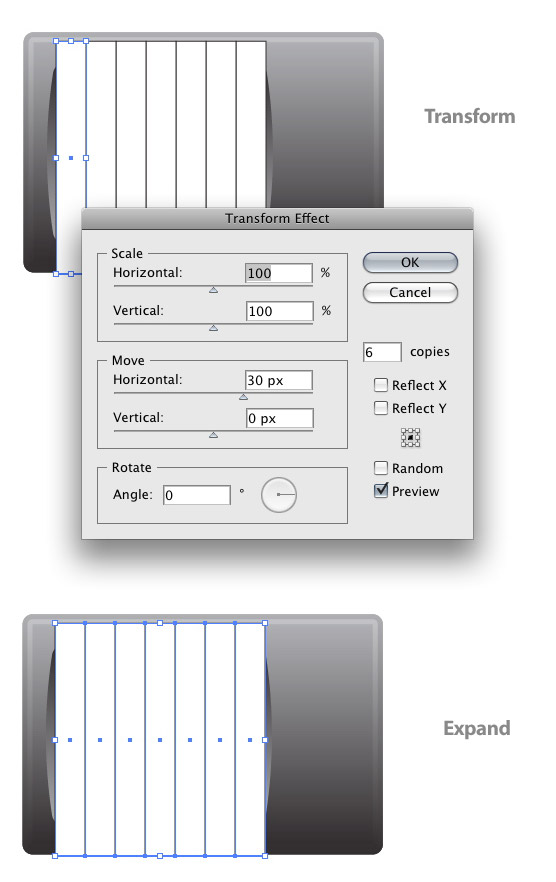
With the new rectangle selected go Effect > Distort & Transform > Transform. In the Transform Effect dialog, change the copies to 6 and the Horizontal to 30 px. Next, go Object > Expand Appearance.
Step 12
Select the original screen shape, go Object > Path > Offset, and change the Offset to -10. Next bring the offset shape to the front by going Object > Arrange > Bring to Front (Command + Shift + ])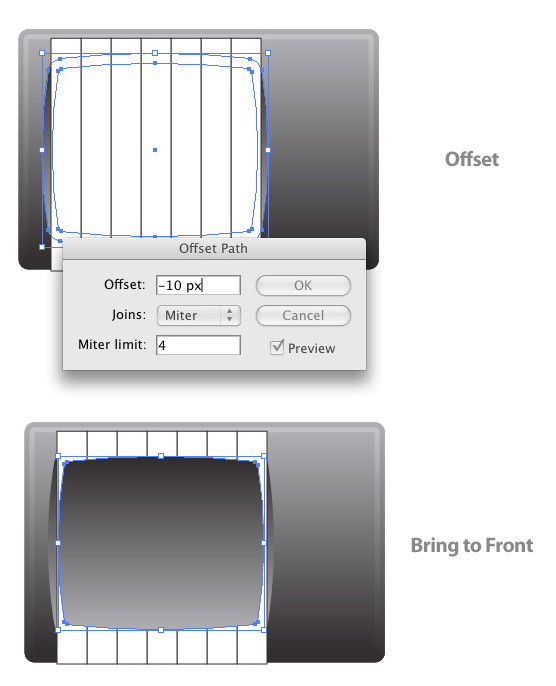
Step 13
Select the offset shape, the seven rectangles, and press the Crop button in the Pathfinder panel. Next, ungroup the objects.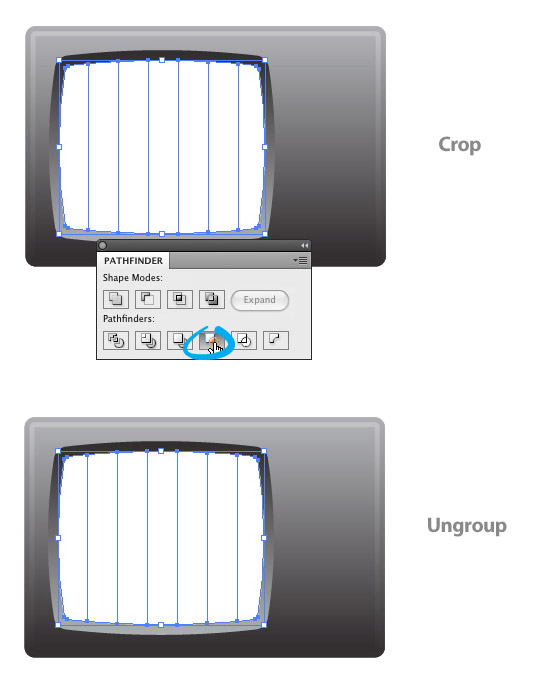
Step 14
Select all the cropped rectangles and fill them with a Linear Gradient. With the Gradient tool (G), click and drag from the center of the rectangles to the bottom. Next, select the farthest left rectangle, change the first Color Stop white, and the second to a light grey. For the second rectangle change the first Color Stop in the gradient to a yellow color and the second to a darker shade of yellow. Repeat chagning the Color Stops in the Gradient panel for each rectangle with different colors, always making the second Color Stop in the gradient a darker shade of the original color.
Step 15
Select the original screen shape, Offset it by -10 px, and bring it to the front. Next, draw an ellipse with the Ellipse tool (L) halfway down the offset shape. Make the ellipse wider than it is tall. Select the offset shape and ellipse and press the Minus Front button in the Pathfinder panel. Now, change the fill of the new shape to white and set the Opacity to 60 in the Transparency panel.
Step 16
Now that we are done with the screen, we can take a look at some of the other television elements. To start, use the Ellipse tool (L) and create a 50 px by 50 px ellipse to the right of the screen.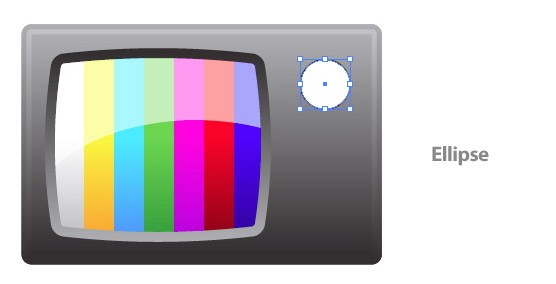
Step 17
With the ellipse selected, use the Eyedropper tool (I) and sample the main television shape’s gradient. Next, adjust the gradient from bottom to top so the lighter part of the gradient is at the bottom of the ellipse.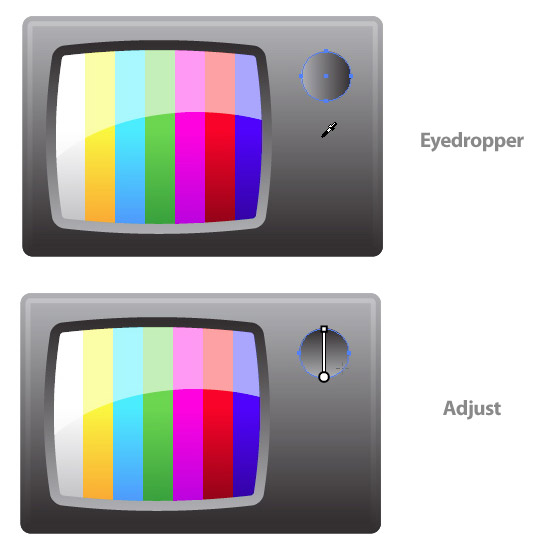
Step 18
With the ellipse selected, offset the path by -10 px and adjust the gradient from top to bottom so the lighter part of the gradient is at the top of the offset ellipse.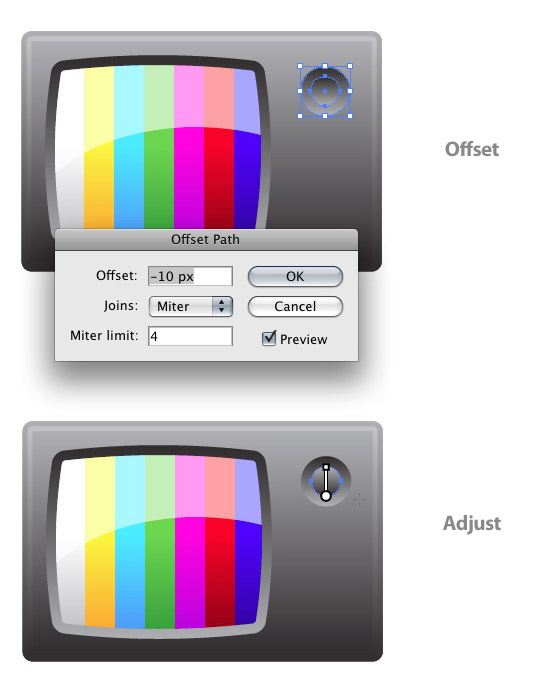
Step 19
With the Rounded Rectangle tool, draw a shape in the middle of the last offset ellipse. Fill the new shape with a linear gradient with the first Color Stop a light grey color and the second Color Stop a Grey color. Next adjust the gradient so the light part of the gradient is at the top of the shape.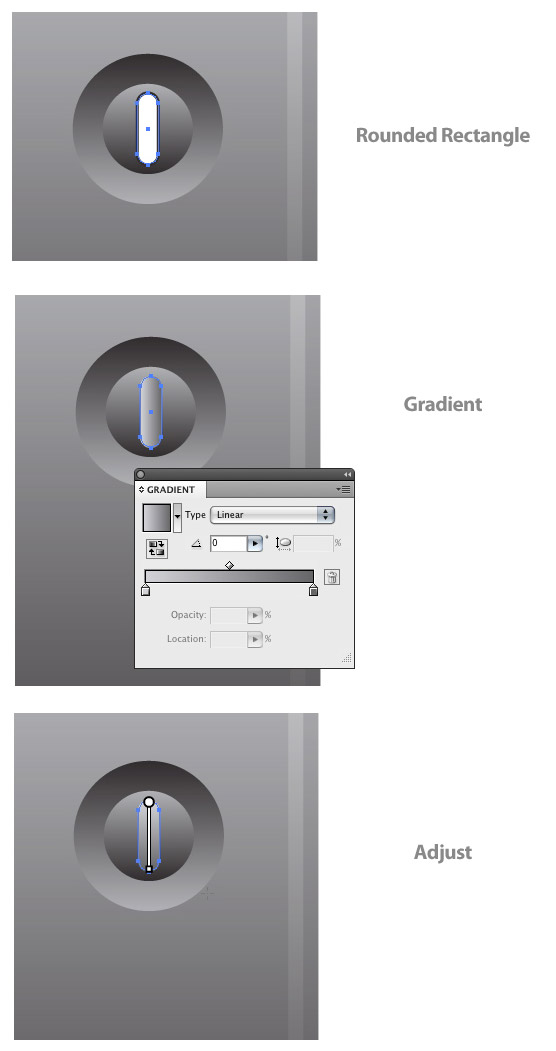
Step 20
Select the original ellipse, the offset ellipse, and the rounded rectangle. Hold down the Shift and Command key (Ctrl key for PC) and drag a copy of the selected shapes below the original.
Step 21
With the Line Segment tool, draw a 70 px wide stroke, just below the knobs that were just created. In the Stoke panel, change the Weight to 4, and press the Round Cap icon.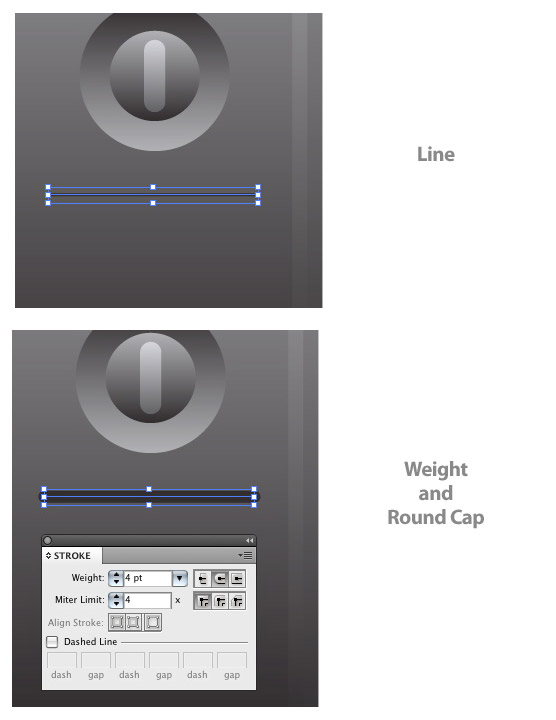
Step 22
With the line select go Object > Path > Outline Stroke. Next fill the outlined stroke with the same gradient and gradient adjustments as the knobs first ellipse.
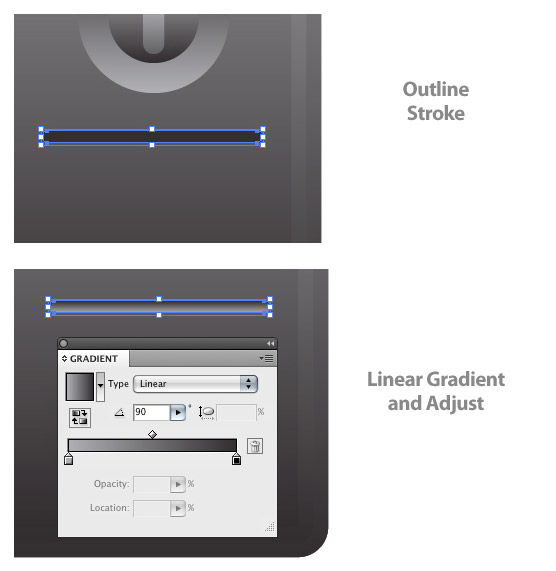
Step 23
With the outlined stroke selected, go Effect > Distort and Transform > Transform, change the copies to 6, and the Vertical Move to -9 px. Next go Object > Expand Appearance.
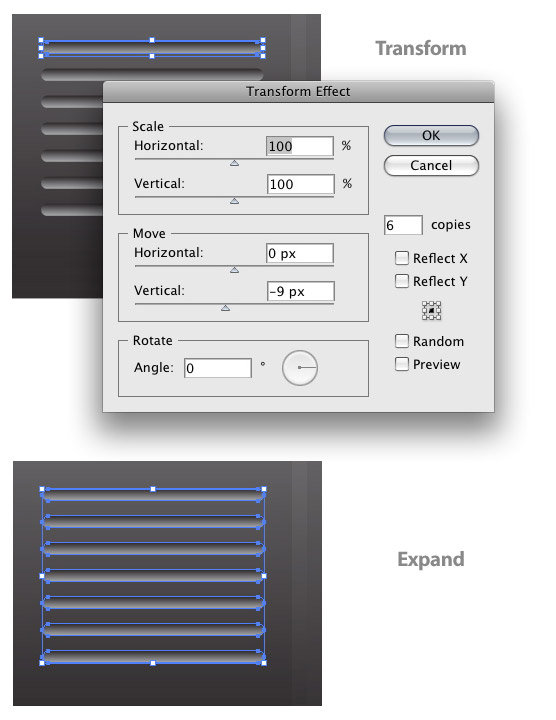
Step 24
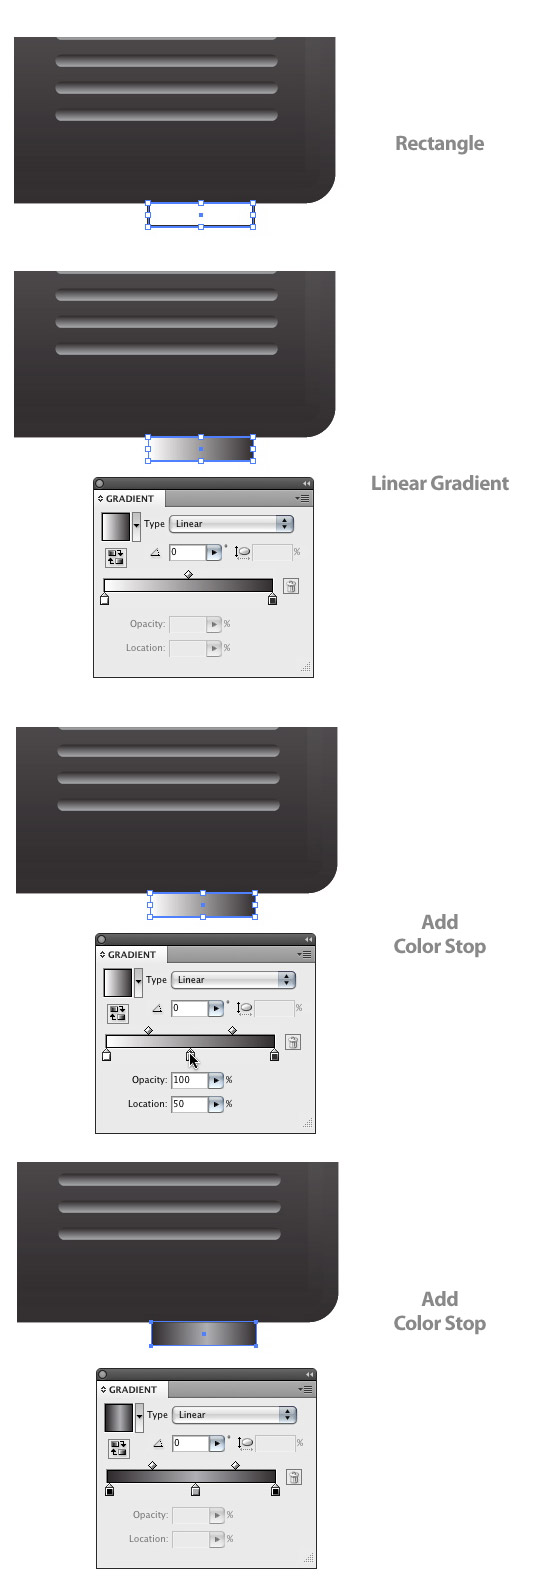
Create a 35 px by 8 px rectangle and place it just bellow the right side of the main television shape and fill the rectangle withe a Linear Gradient from the Gradient panel. For this gradient we are going to add another Color Stop, giving us a total of three. To add a Color Stop to the gradient, click right below the Gradient Slider in the Gradient Panel. Change the first Color Stop to a dark grey, the second to a grey, and the last to the same dark grey as the first one.
Step 25
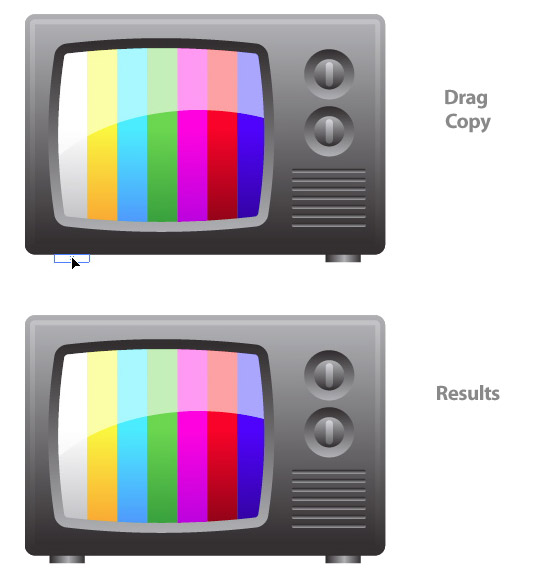
With the new rectangle selected, hold down the Shift and Command key (Ctrl key for PC) and drag a copy of the rectangle to the left side of the television.
Step 26
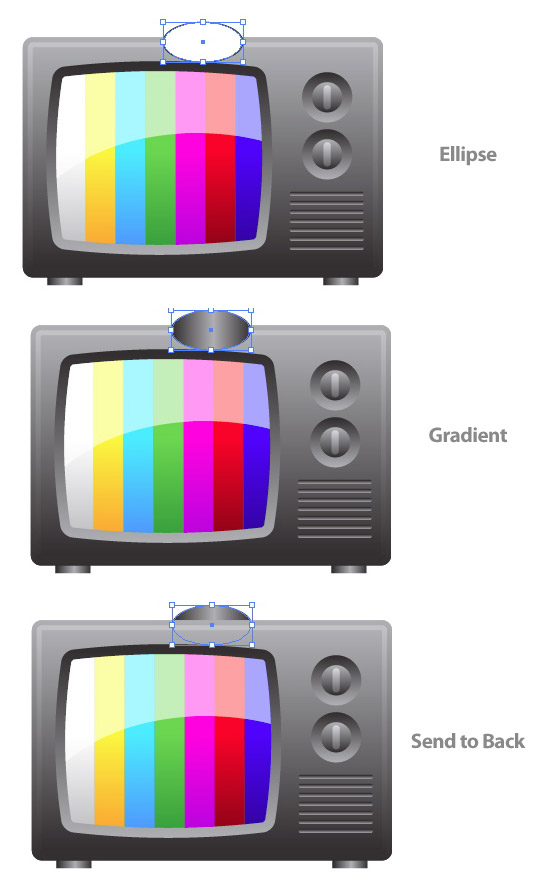
Draw a 80 px wide by 40 px tall ellipse and place over the top of the television. Fill the ellipse with the same gradient as the previous rectangles. Next, go Object > Arrange > Send to Back (Command + Shift + [).
Step 27
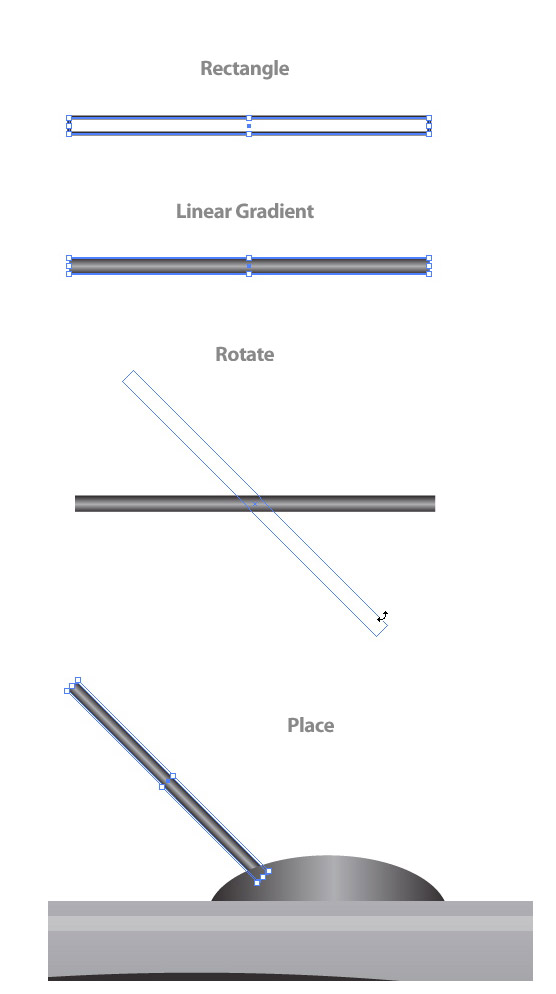
Create a 90 px wide by 4 px tall rectangle and fill it with the same linear gradient as the previous ellipse. With the rectangle selected, use the Selection tool (V), hold down shift, and rotate the rectangle 45 degrees. Send the rectangle to the back (Command + Shift + [) and place on the left side of the previous ellipse.
Step 28
Draw an 11 px by 11px ellipse and fill it with a Radial gradient from the Gradient panel. Change the first Color Stop to grey and the second Color Stop to a dark grey. Place the ellipse over the top of the previous rectangle.
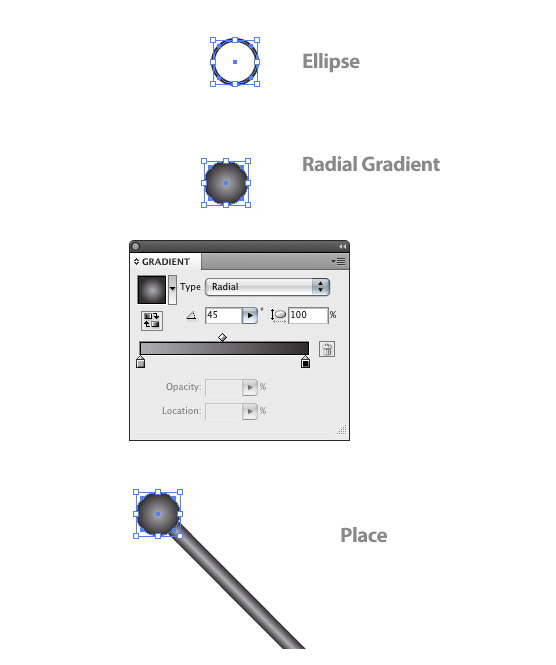
Step 29
Select the ellipse and rectangle (making and antenna shape) and Copy (Command + C) and Paste in Front (Command + F). With the copies selected, go Object > Transform > Reflect, check the Vertical radial button in the Reflect dialog, and press OK. Next move the antenna shapes to the right side of the above ellipse.
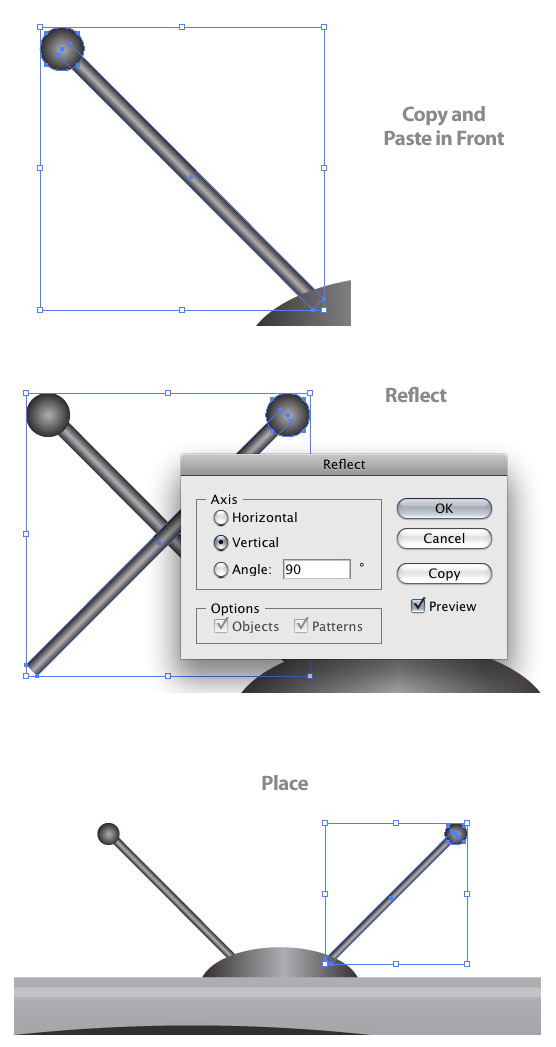
Step 30
Select all the television artwork and Copy (Command + C) and Paste in Front (Command + F). With the copies selected, go Object > Transform > Reflect, check to Horizontal button in the Reflect dialog, and move the reflected copies so the television foots line up.

Step 31
Create a rectangle that cover the reflected television copy. Fill the rectangle with a linear gradient, change the first stop to white and the second stop to black. Adjust the gradient by clicking from the top of the rectangle to the bottom. Next select the rectangle and copied television shapes, click the pop-up menu in the Transparency panel, and choose Make Opacity Mask. While still in the transparency panel, change the opacity of the mask to 40 percent.

Step 32
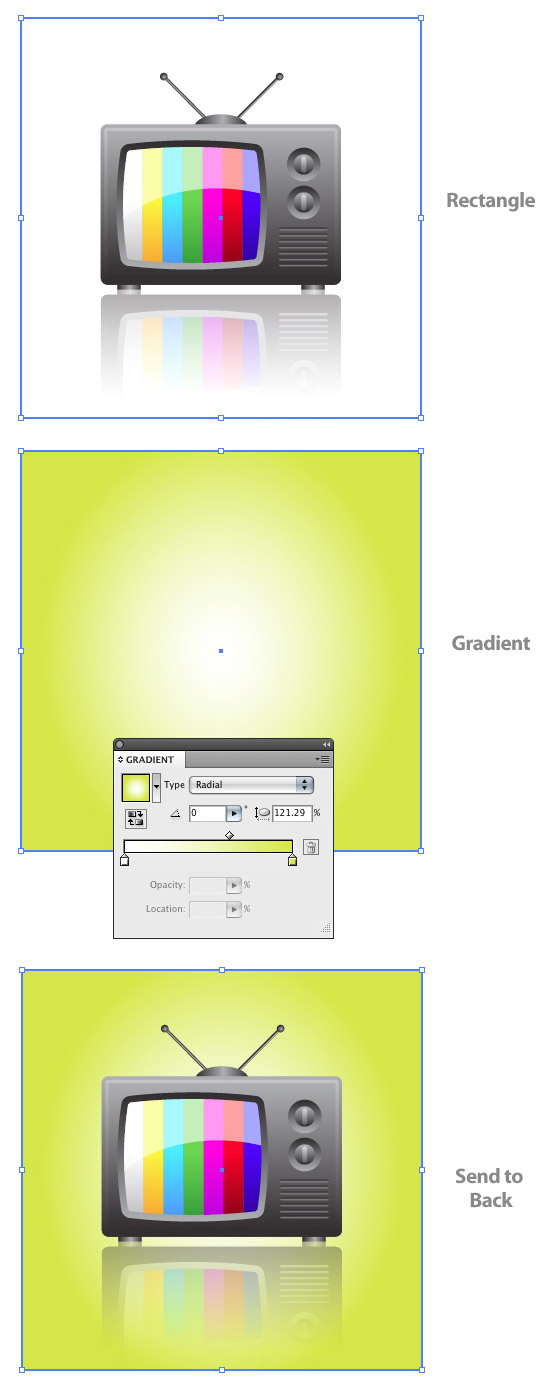
Create a rectangle the size of your document, fill it with a Radial Gradient, change the first Color Stop to a light green, the second Color Stop a green, and place it behind all the television artwork. All done!
DOWNLOAD THE SOURCE FILE WHEN YOU ARE A MEMBER. Login Or Sign up
Vector File of this tutorial is not available
You May also like Some more Drawing Tutorials OR full list of Tutorials!
[categorythumbnaillist 13]
 Printables, graphics, backgrounds, vectors, illustrations, fonts, and design elements given on this site are for personal use only. You may not alter them or redistribute them for free or monetary gain without written consent from the author, Asma Murad. If you want to share these resources with others, please share the link to the blog post. Teachers/educators: You may share these with your classes and colleagues as long as they are not edited in any way, Cliparts & Resources shared for free are not to be used as printables for sale.

